Русский
 Deutsch
 Українська
The walls in your home are more than just vertical surfaces that define space. They are the largest and often underestimated “canvas” that can completely transform an interior, giving it depth, character, and individuality. Unlike store-bought decor, which often looks standard and soulless, DIY wall decor gives you complete control over color, texture, and meaning. It’s not just about saving money, but also an opportunity to integrate personal stories into your space.
As a professional furniture and interior design expert, I can confidently say that well-chosen and executed wall decor can become the perfect accent that ties together a sofa, dresser, and lighting. In this article, we will explore 15 specific, practical ideas, and provide clear instructions on choosing materials, planning dimensions, and caring for your unique creations.
Types and Categories of Wall Decor: From Simple to Complex
Before you start, it’s important to classify what type of decor is suitable for your wall and your skill level. DIY decor can be divided into four main categories based on installation complexity and scale:
- Flat Decor (Low Relief): This includes stencil painting, photo collages, prints, and flat panels made of paper or fabric. It requires minimal skills but high precision in layout.
- Volumetric Decor (High Relief): This includes 3D panels, wall sculptures, and compositions made of branches, preserved moss, or plaster. It requires more complex materials (glue, mounting foam, putty) and sturdy fastenings.
- Functional Decor: Elements that not only decorate but also serve a practical purpose. These can be decorative shelves, cork boards for notes, hanging organizers, or mirror compositions.
- Textural Decor: Creating texture directly on the wall using decorative plaster, liquid wallpaper, or textile inserts. This requires skills in working with finishing materials.
Materials for Wall Decor: What to Choose for a Durable Result
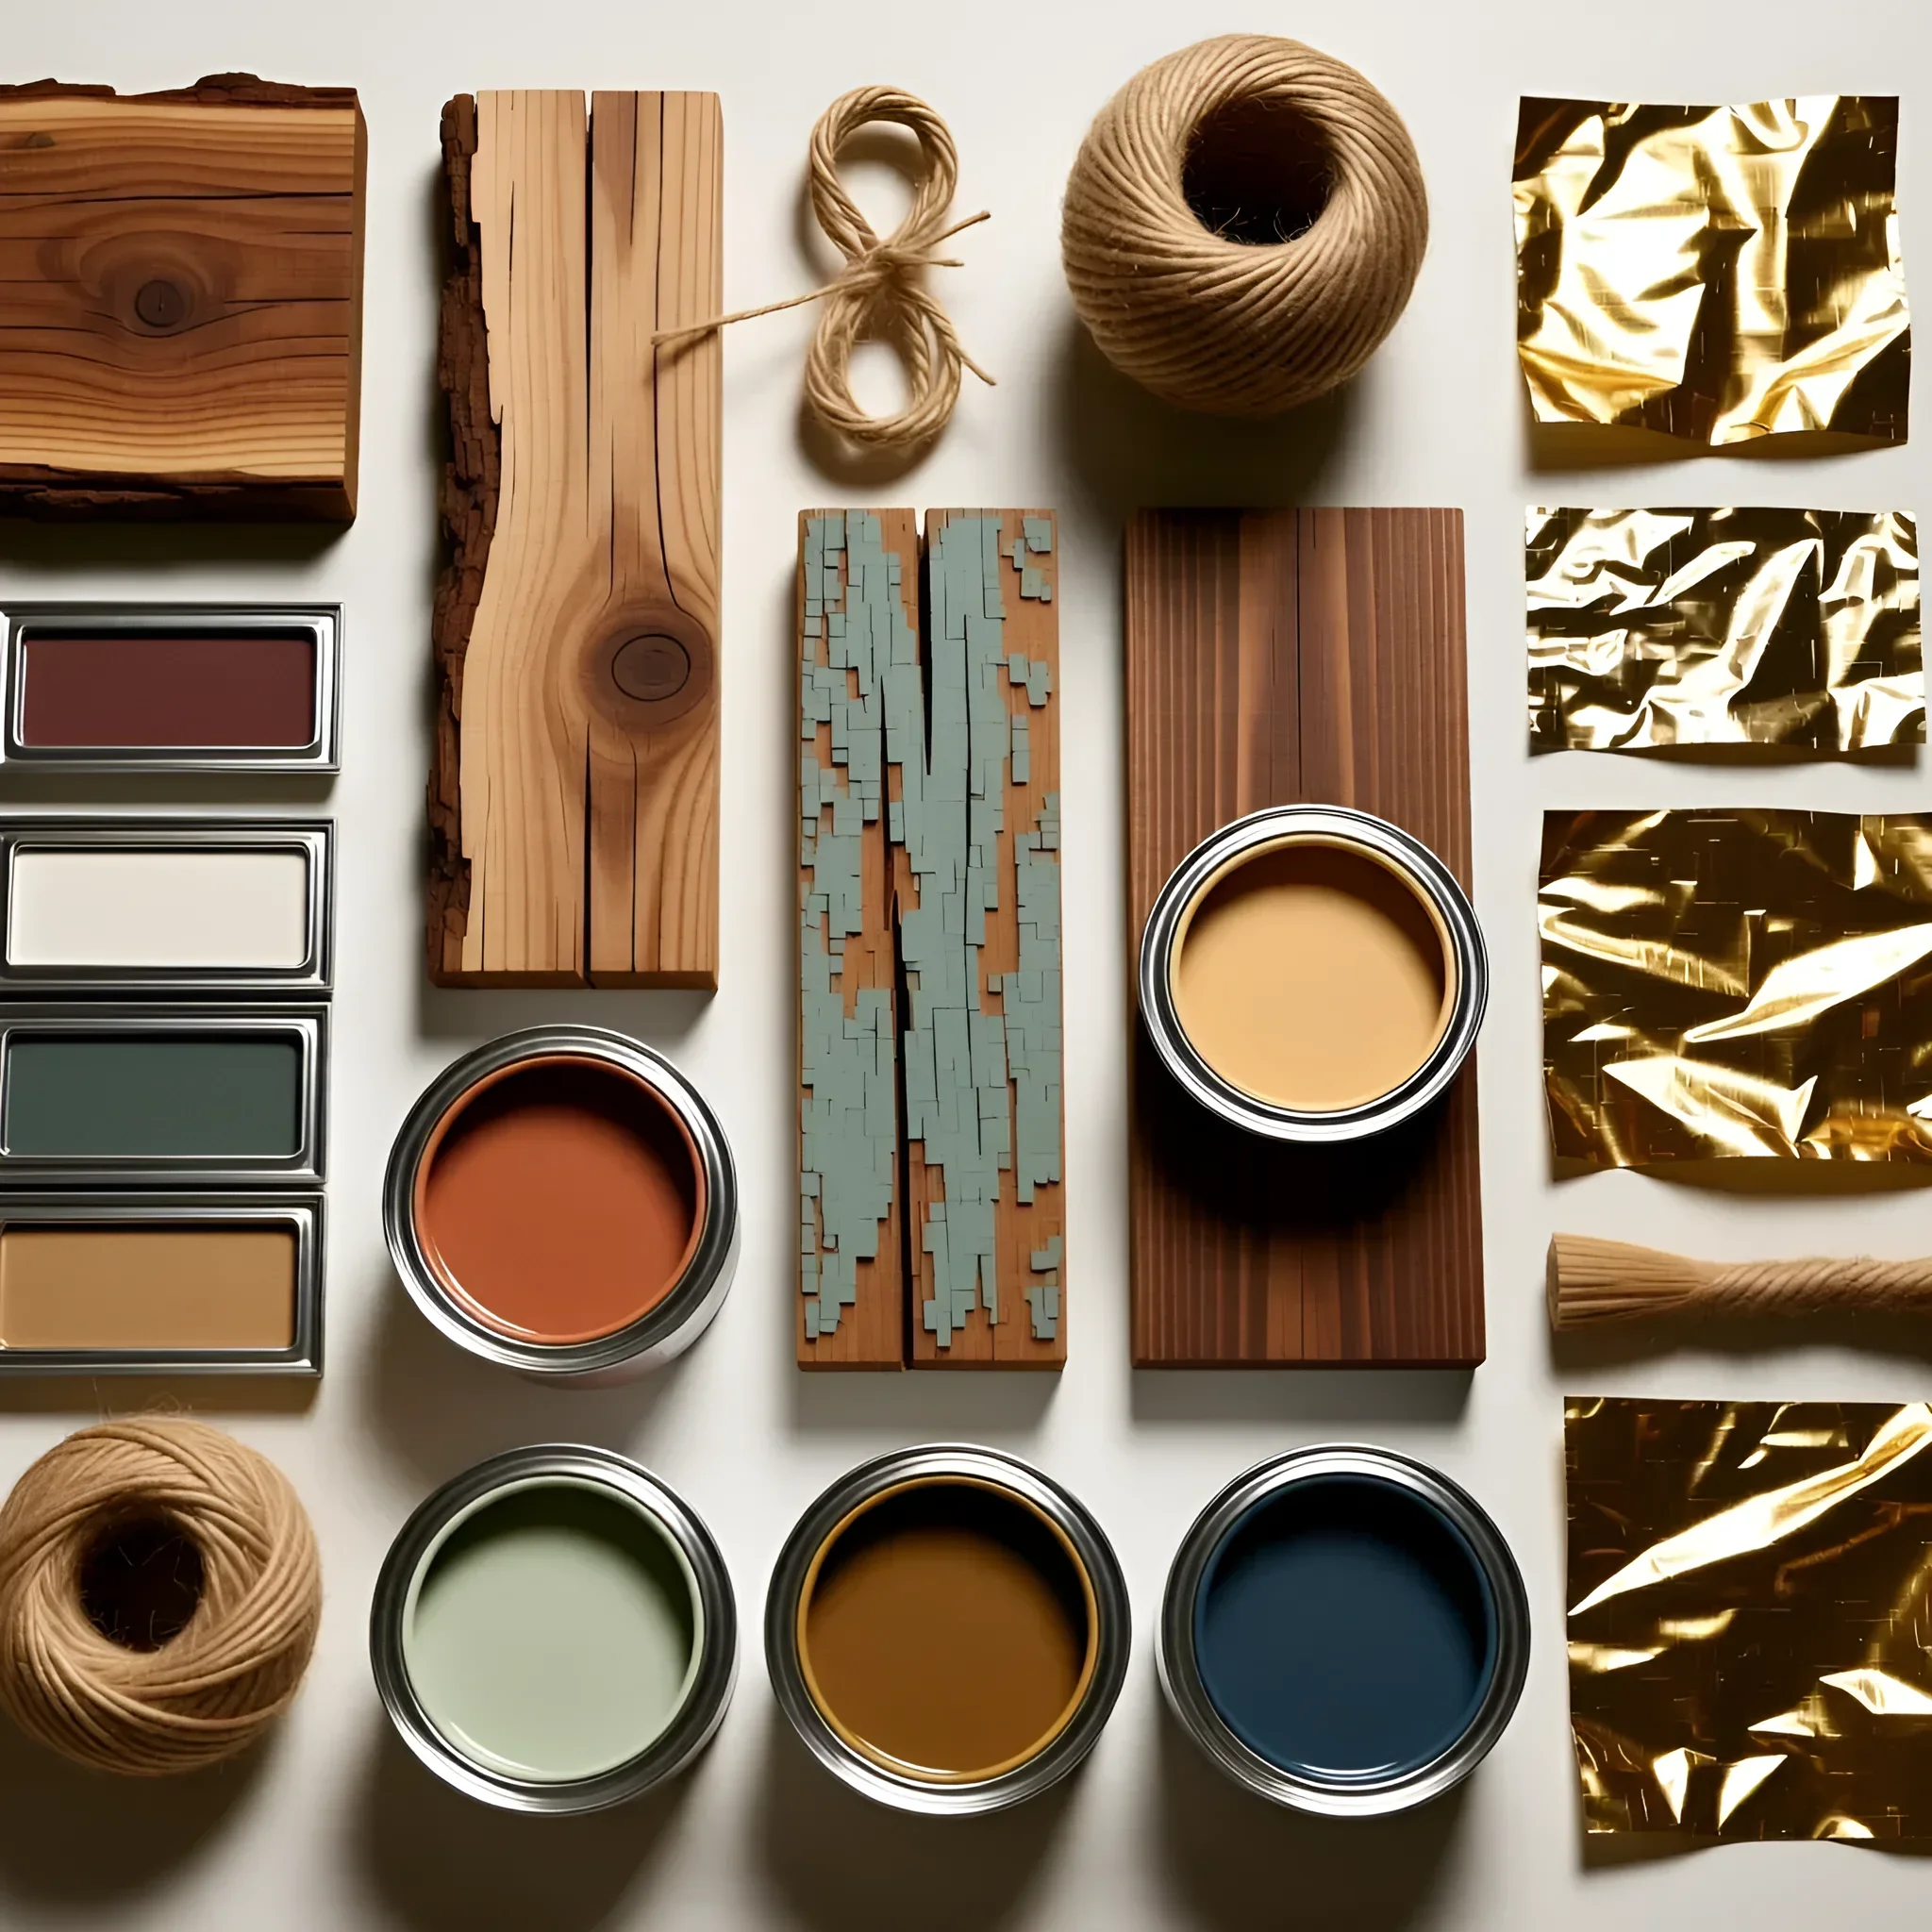
The choice of material directly affects the durability of your project, its weight, and, of course, its appearance. We recommend using materials that are easy to work with but also resistant to moisture and fading.
Comparison of Popular DIY Materials:
| Material | Advantages | Disadvantages | Recommended Thickness/Density |
|---|---|---|---|
| Wood (Plywood/MDF) | Strength, easy to paint, ideal for geometric shapes and shelves. | Sensitive to moisture (requires priming), relatively heavy. | Plywood 6-10 mm; MDF 3-6 mm (for light panels). |
| Textile (Cotton, Jute, Macrame) | Creates coziness, excellent sound insulation, lightweight. | Dust accumulation, requires periodic cleaning. | Jute cord 3-5 mm; cotton cord 4-7 mm. |
| Plaster/Putty | Ideal for creating 3D effects and bas-reliefs, non-combustible. | Brittleness upon impact, long drying time. | Application layer 1-3 cm. |
| Cardboard/Foam Board | Maximum lightness, low cost, ideal for temporary decor. | Extremely sensitive to moisture, easily deformed. | Foam board 5-10 mm; bookbinding cardboard 2-3 mm. |
15 Original DIY Wall Decor Ideas: Step-by-Step Instructions
These ideas cover different skill levels and materials. Choose the one that best suits your style and abilities.
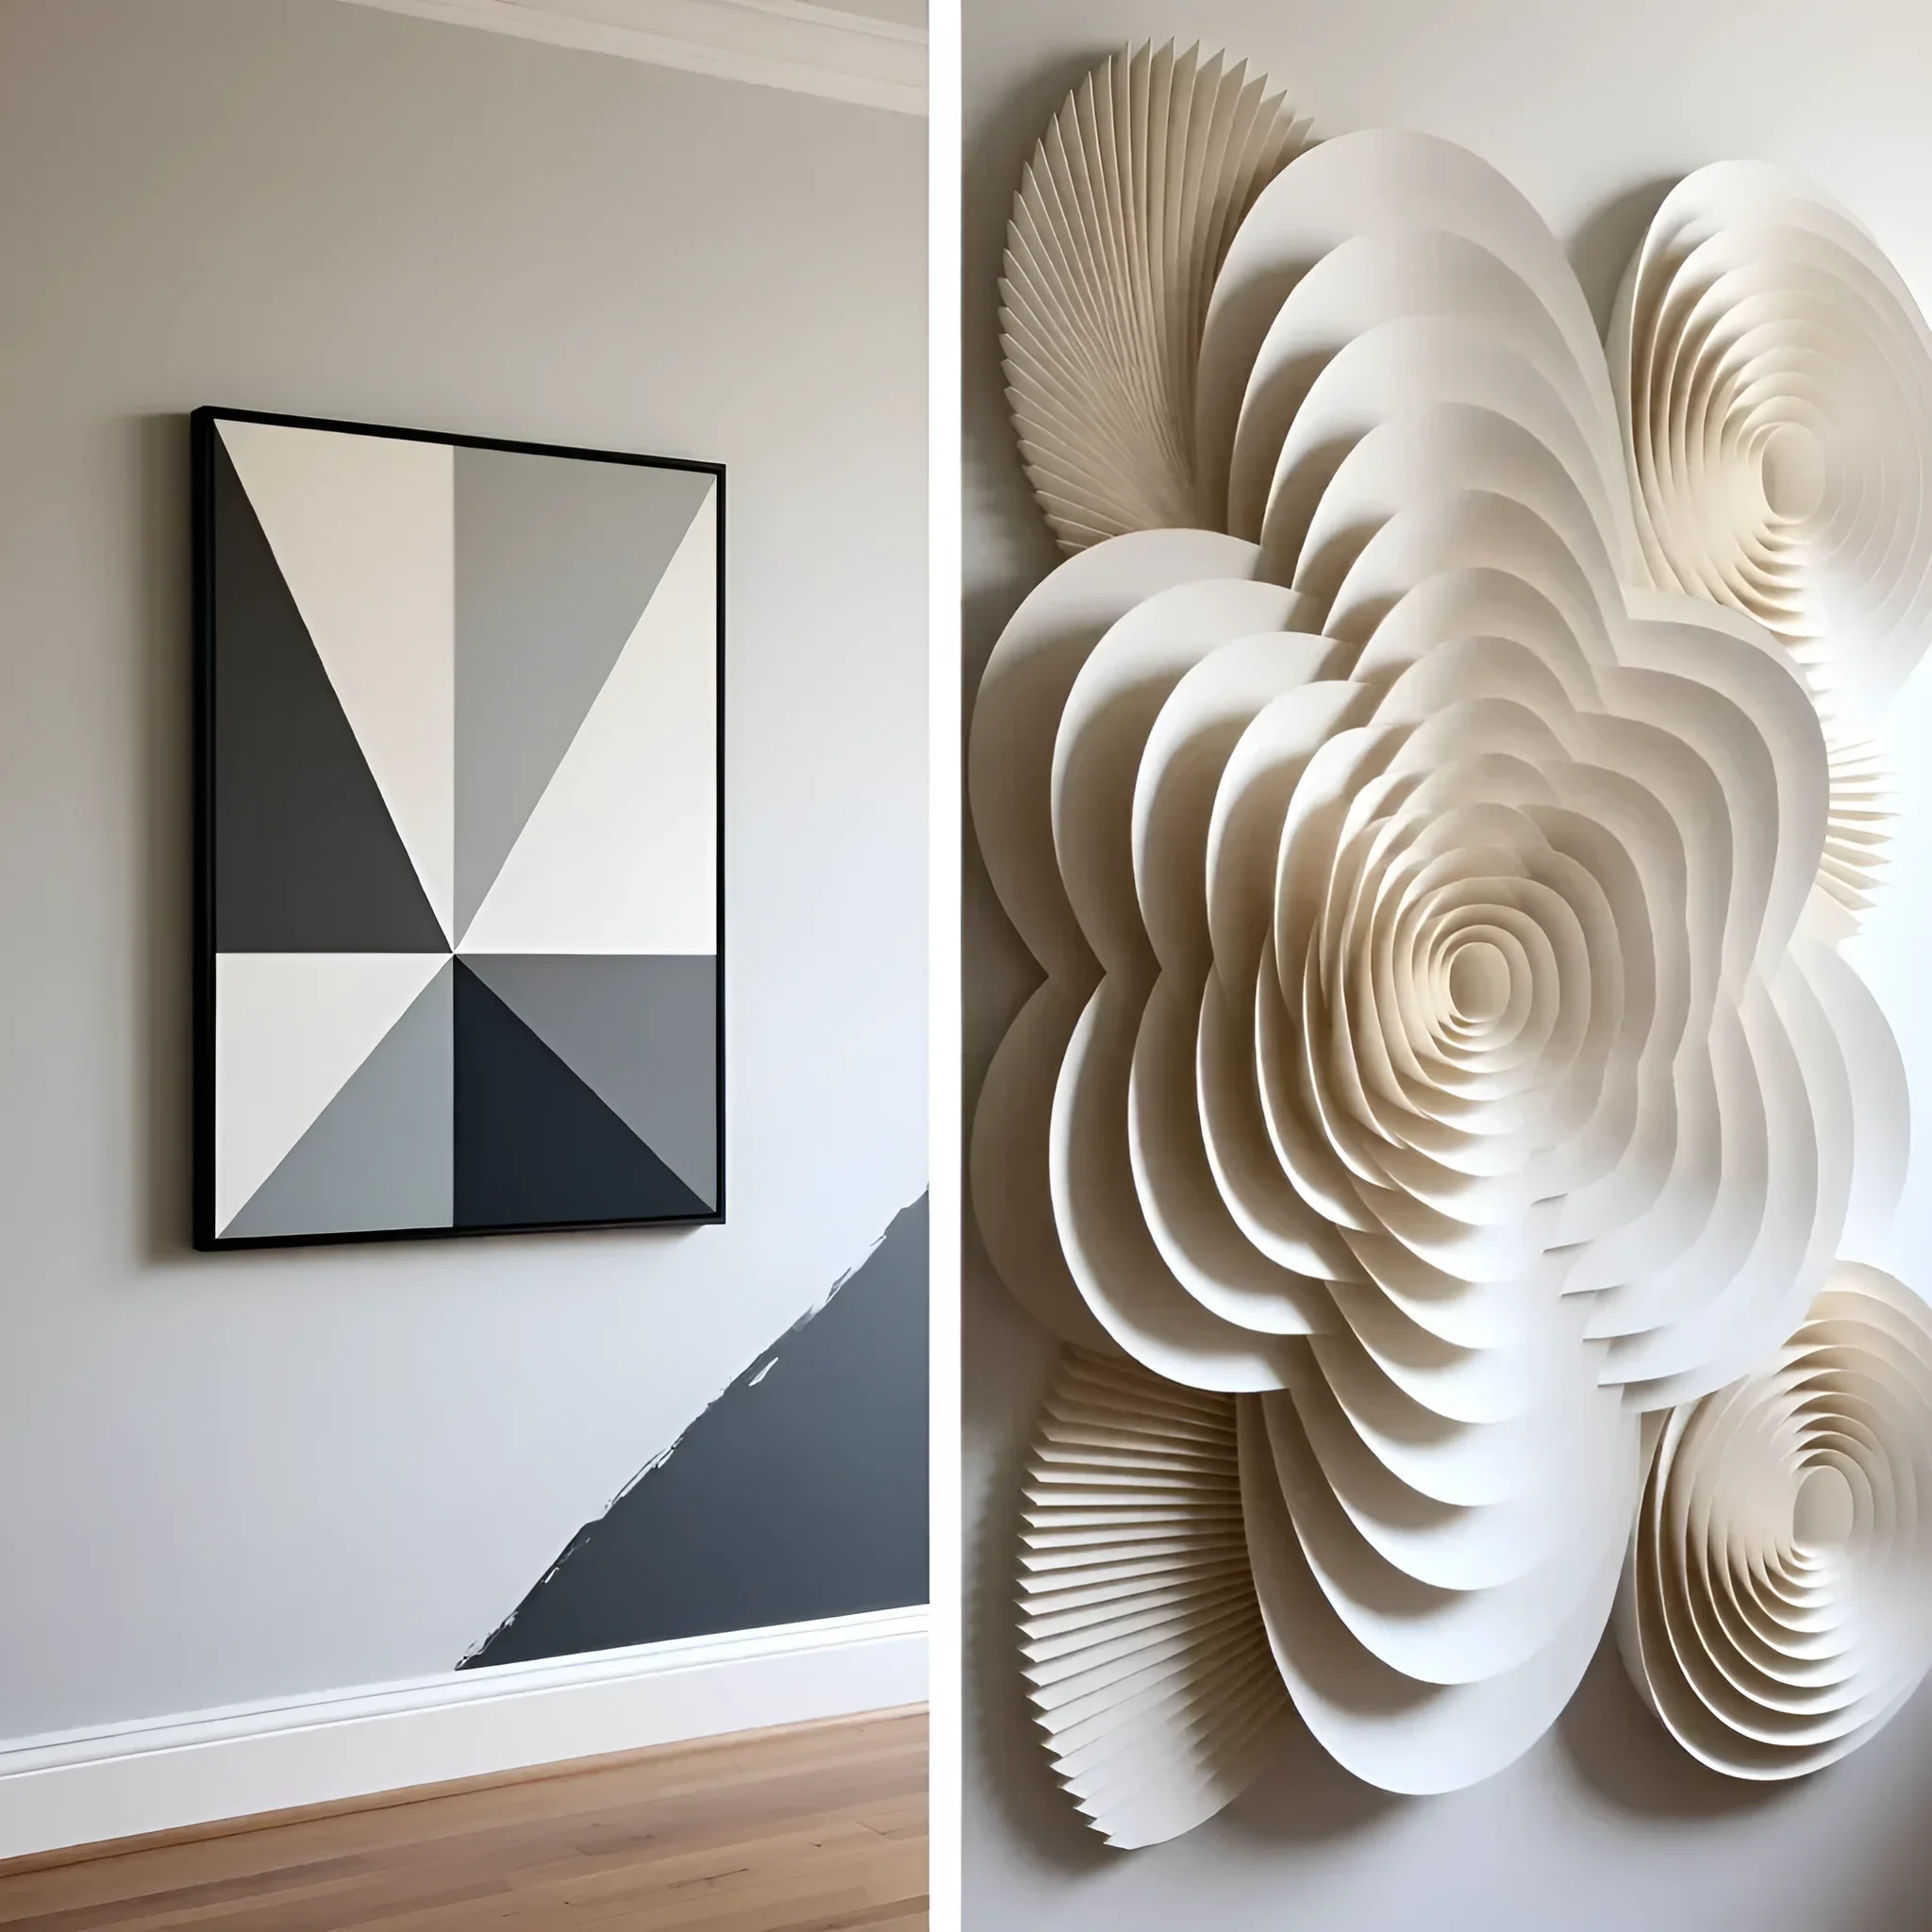
1. Geometric Color Block Painting
- Concept: Creating large, sharp geometric shapes on the wall using contrasting or complementary colors.
- Materials: Masking tape (19 mm width), matte wall acrylic paint, tape measure, level.
- Instructions: Mark the boundaries of the shapes with a pencil. Apply tape strictly along the lines, ensuring the edges adhere firmly. Apply paint in 2-3 coats, allowing each coat to dry. Carefully remove the tape before the paint is completely hardened to avoid tearing.
2. Preserved Moss Panel
- Concept: Eco-friendly decor that requires no care or watering. Creates a “living wall” effect.
- Materials: MDF base (6 mm thickness), preserved moss (reindeer or cushion moss), hot glue gun.
- Instructions: Cut the base into the desired shape (circle, rectangle). Apply glue to a small area of the base and press the moss firmly, filling the space without gaps. Important: The moss must be preserved; regular moss is not suitable for interiors.
3. 3D Composition from Cardboard Tubes
- Concept: Creating a textured panel from rolled or cut cardboard elements. Mimics wood or metal after painting.
- Materials: Paper towel tubes or thick cardboard (2 mm), PVA glue, black or gold spray paint.
- Instructions: Cut the cardboard into strips of equal width (e.g., 2 cm) and roll them into tight spirals or tubes. Glue the elements to a sturdy backing, forming a pattern. After complete drying, paint in one color.
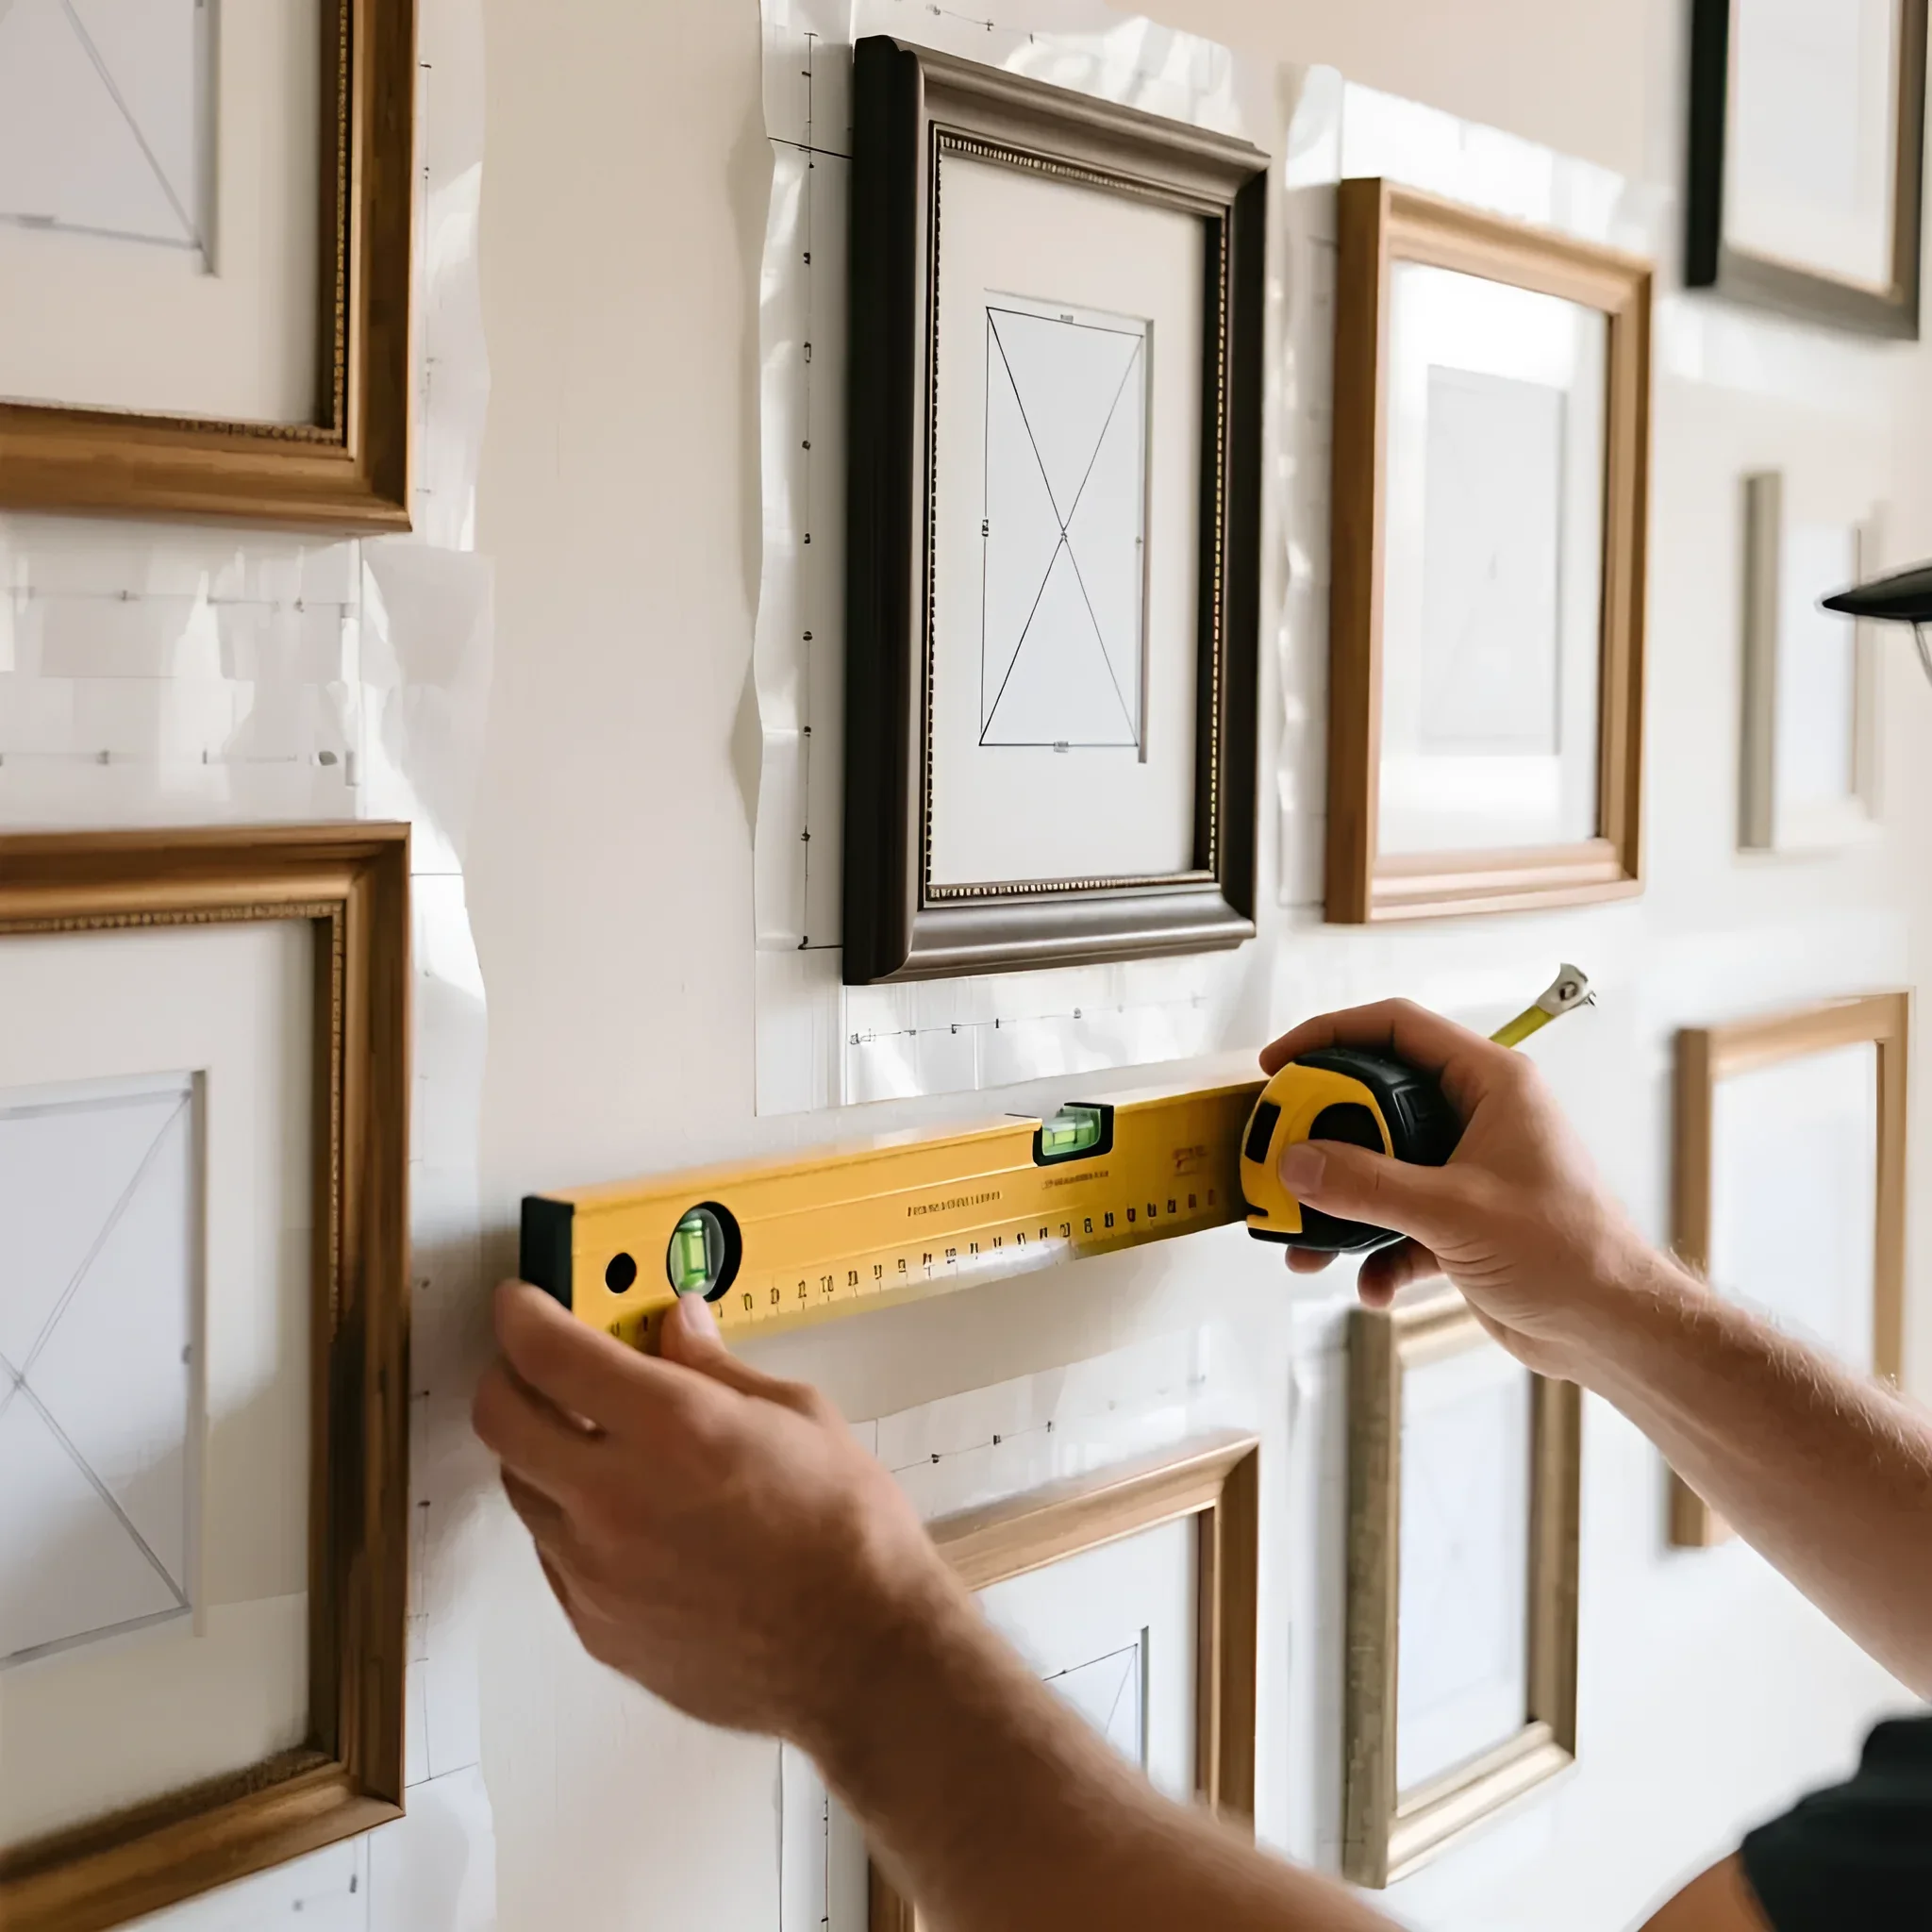
4. Gallery Wall with a Unified Color Accent
- Concept: Combining frames of different sizes (A4, 20×30, 30×40 cm) with a unifying element, such as a single-color mat or black-and-white photos.
- Materials: Frames of various sizes, prints, mats (ideally 4-6 cm wide).
- Instructions: Arrange the composition on the floor, determining the spacing between frames (optimally 5-8 cm). Use paper templates to transfer the layout to the wall to avoid mistakes.
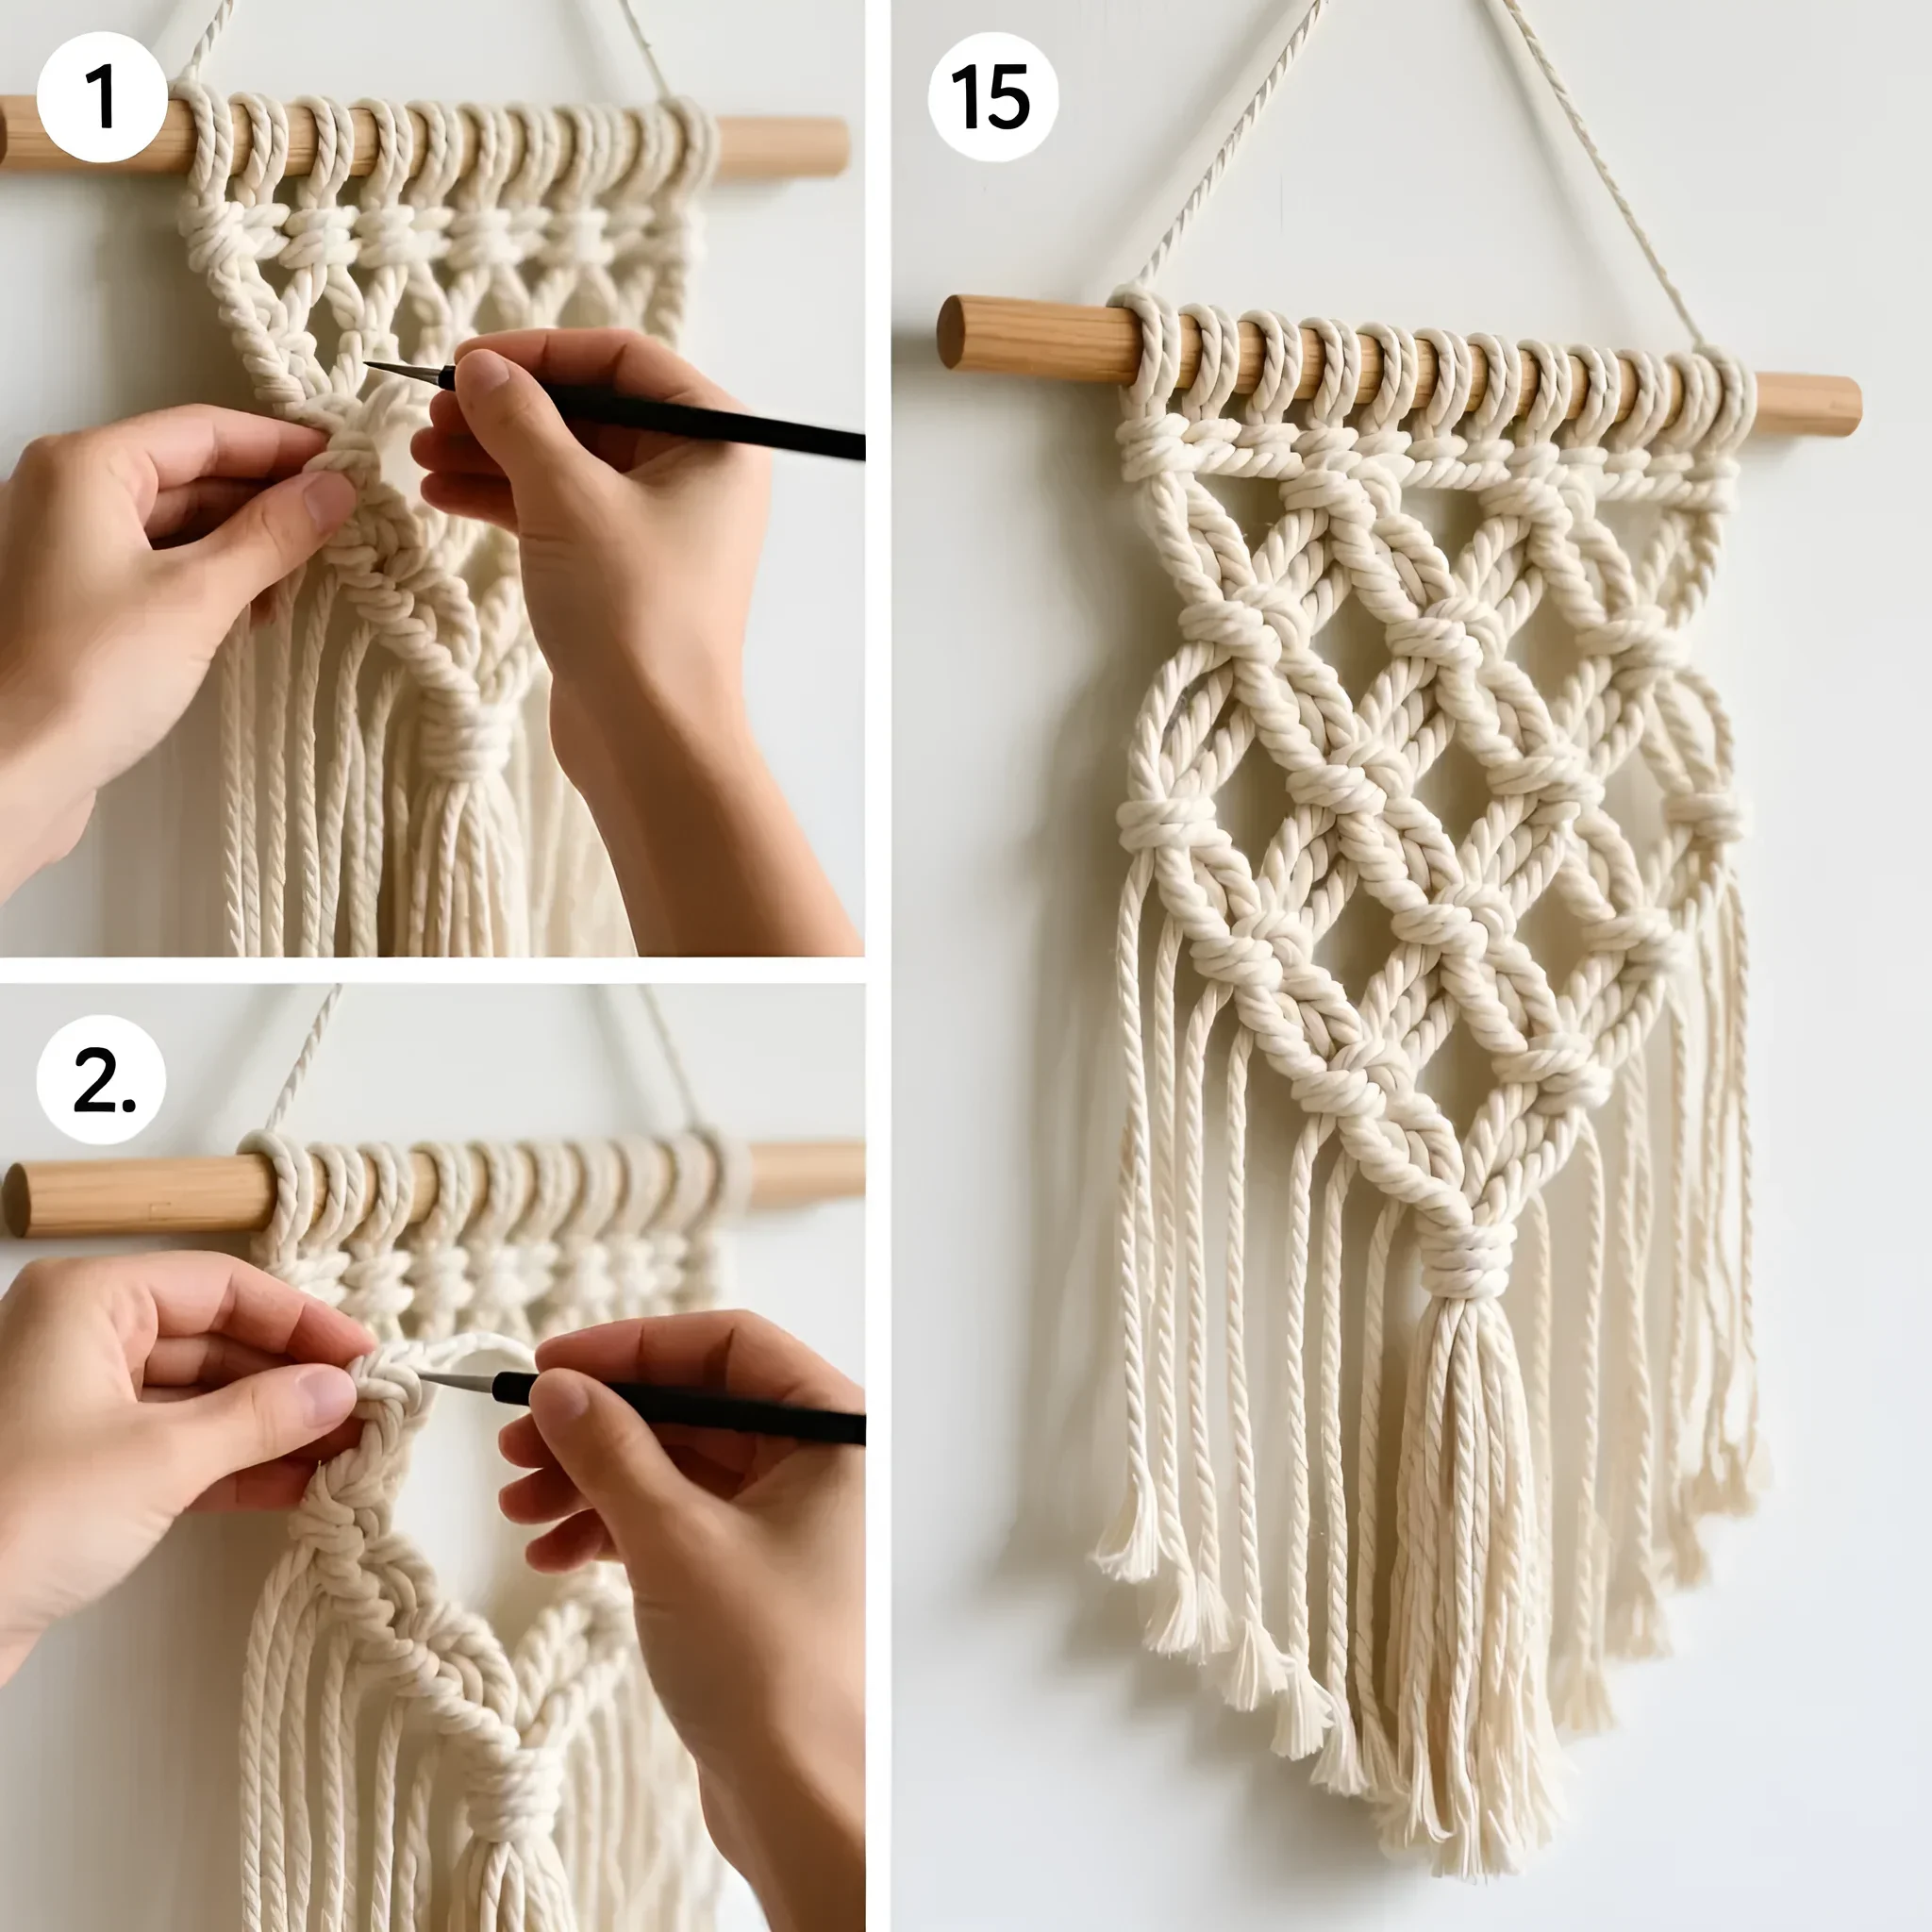
5. Scandinavian Style Macrame Panel
- Concept: A vertical textile piece that creates softness and coziness.
- Materials: Wooden stick or driftwood (50-80 cm length), cotton cord (4-5 mm thickness), scissors.
- Instructions: Learn basic macrame knots (square knot, half hitch). Cut cords to equal lengths (2-3 meters extra for each element) and attach them to the stick. Knot to form a geometric or asymmetrical pattern.
6. Mirror Mosaic from Tiles
- Concept: Using small mirror tiles (5×5 cm or 10×10 cm) to visually expand space.
- Materials: Square mirror tiles with a bevel, special mirror adhesive (should not damage the amalgam), level.
- Instructions: Mark the wall. Use a notched trowel for even adhesive application. Apply tiles, leaving minimal gaps.
7. Using Vinyl Records (for Loft/Retro Style)
- Concept: Creating an accent from old vinyl records, painted or left in their original state.
- Materials: Vinyl records (30 cm diameter), high-strength double-sided tape (or silicone adhesive), acrylic paint (optional).
- Instructions: Records can be painted in bright colors or stenciled with patterns. Attach to the wall using tape or adhesive, arranging them in a staggered pattern or a wave.
8. Bas-Relief from Finishing Putty
- Concept: Creating a relief pattern (leaves, flowers, abstract) directly on the wall. This technique requires patience.
- Materials: Finishing polymer putty, palette knife or spatula, brushes, deep penetration primer.
- Instructions: Prime the wall. Apply a base layer of putty (about 1 mm). While it’s still wet, apply additional layers to form the relief. After complete drying (up to 48 hours), cover with varnish or acrylic paint.
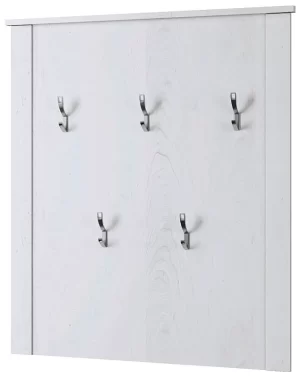
9. Pegboard Wall Organizer
- Concept: Functional decor, ideal for a home office or kitchen.
- Materials: Pegboard (HDF or 6 mm plywood) 60×90 cm, mounting hooks, decorative baskets.
- Instructions: Cut the board to the desired size. Paint it. Mount on the wall using stand-off brackets (to leave space for hooks). Arrange hooks and shelves.
10. Wooden Slice Panel
- Concept: Creating a rustic accent from thin cross-sections of wood.
- Materials: Wood slices (5-10 mm thickness, 3-10 cm diameter), thin plywood base, wood glue.
- Instructions: Sand the slices, coat them with varnish or stain. Glue the slices to the plywood base as closely as possible, alternating sizes.
11. Decor from Empty Frames
- Concept: Using empty, but decoratively finished frames to create visual volume.
- Materials: Old baguette frames (preferably with carved elements), spray paint (gold, silver, patina).
- Instructions: Clean the frames, fill any defects with putty. Paint in one or more coats. Arrange on the wall, overlapping frames to create a layered effect.
12. 3D Letters and Words from Foam or PVC
- Concept: Personalized decor with a text message.
- Materials: Sheet extruded polystyrene foam (2-3 cm thickness), craft knife, acrylic sealant, paint.
- Instructions: Print the font template. Cut out the letters. Prime and paint. Attach using double-sided tape or “liquid nails” adhesive.
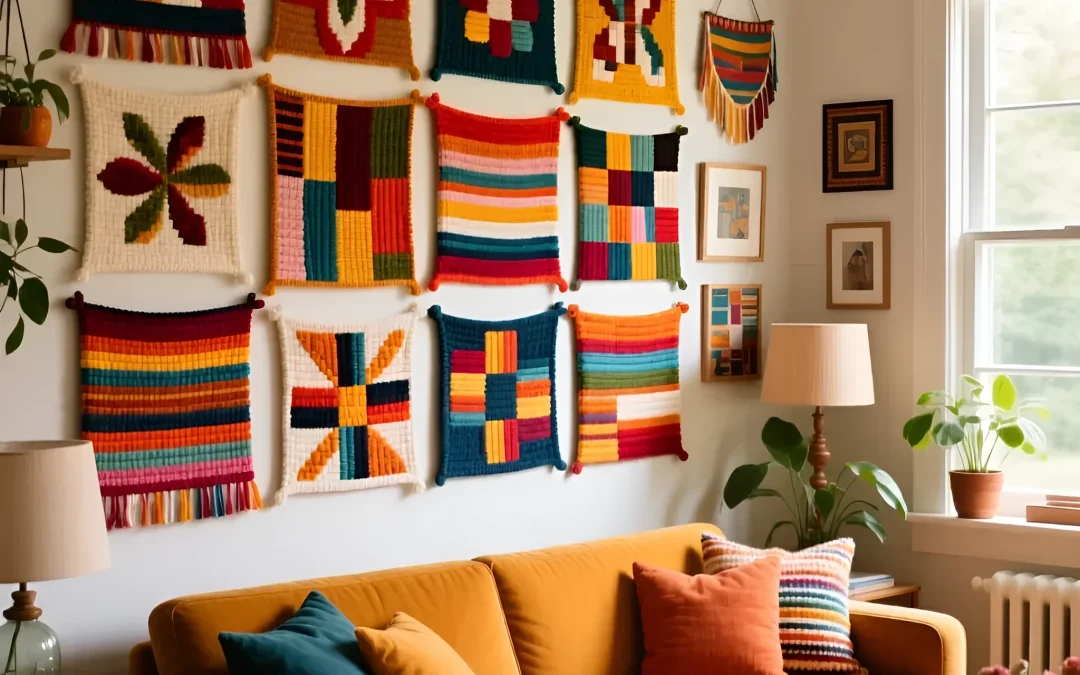
13. Wall Rug/Tapestry (DIY Tufting)
- Concept: Creating a small textile rug that hangs on the wall. Requires special tools.
- Materials: Tufting gun (if available), acrylic or wool yarn, special backing fabric, carpet adhesive.
- Instructions: Stretch the fabric on a frame. Use the gun to create the pattern. Apply special adhesive to the back to secure the pile.
14. Wine Cork Decor
- Concept: Eco-friendly and textured decor, ideal for wine cellars or kitchens.
- Materials: Approximately 300-500 wine corks, a frame for the panel, hot glue.
- Instructions: Corks can be cut in half lengthwise or left whole. Glue the corks to the base, forming a staggered or diagonal pattern. Corks cut in half create a “honeycomb” effect.
15. Cardboard Brick Cladding Imitation
- Concept: Budget-friendly imitation of loft style.
- Materials: Corrugated cardboard (from boxes), scissors, PVA glue, brown and white paint.
- Instructions: Cut the cardboard into “bricks” (standard brick size 25×6.5 cm). Slightly bend the edges to give them an uneven look. Glue to the wall, leaving a 1-1.5 cm gap. After drying, paint brown, and tone the gaps with white or gray paint.
How to Choose a Decor Technique to Match Your Interior Style
Your decor should harmonize with the overall style of furniture and finishes. The wrong choice can create visual dissonance, even if the piece itself is impeccably made.
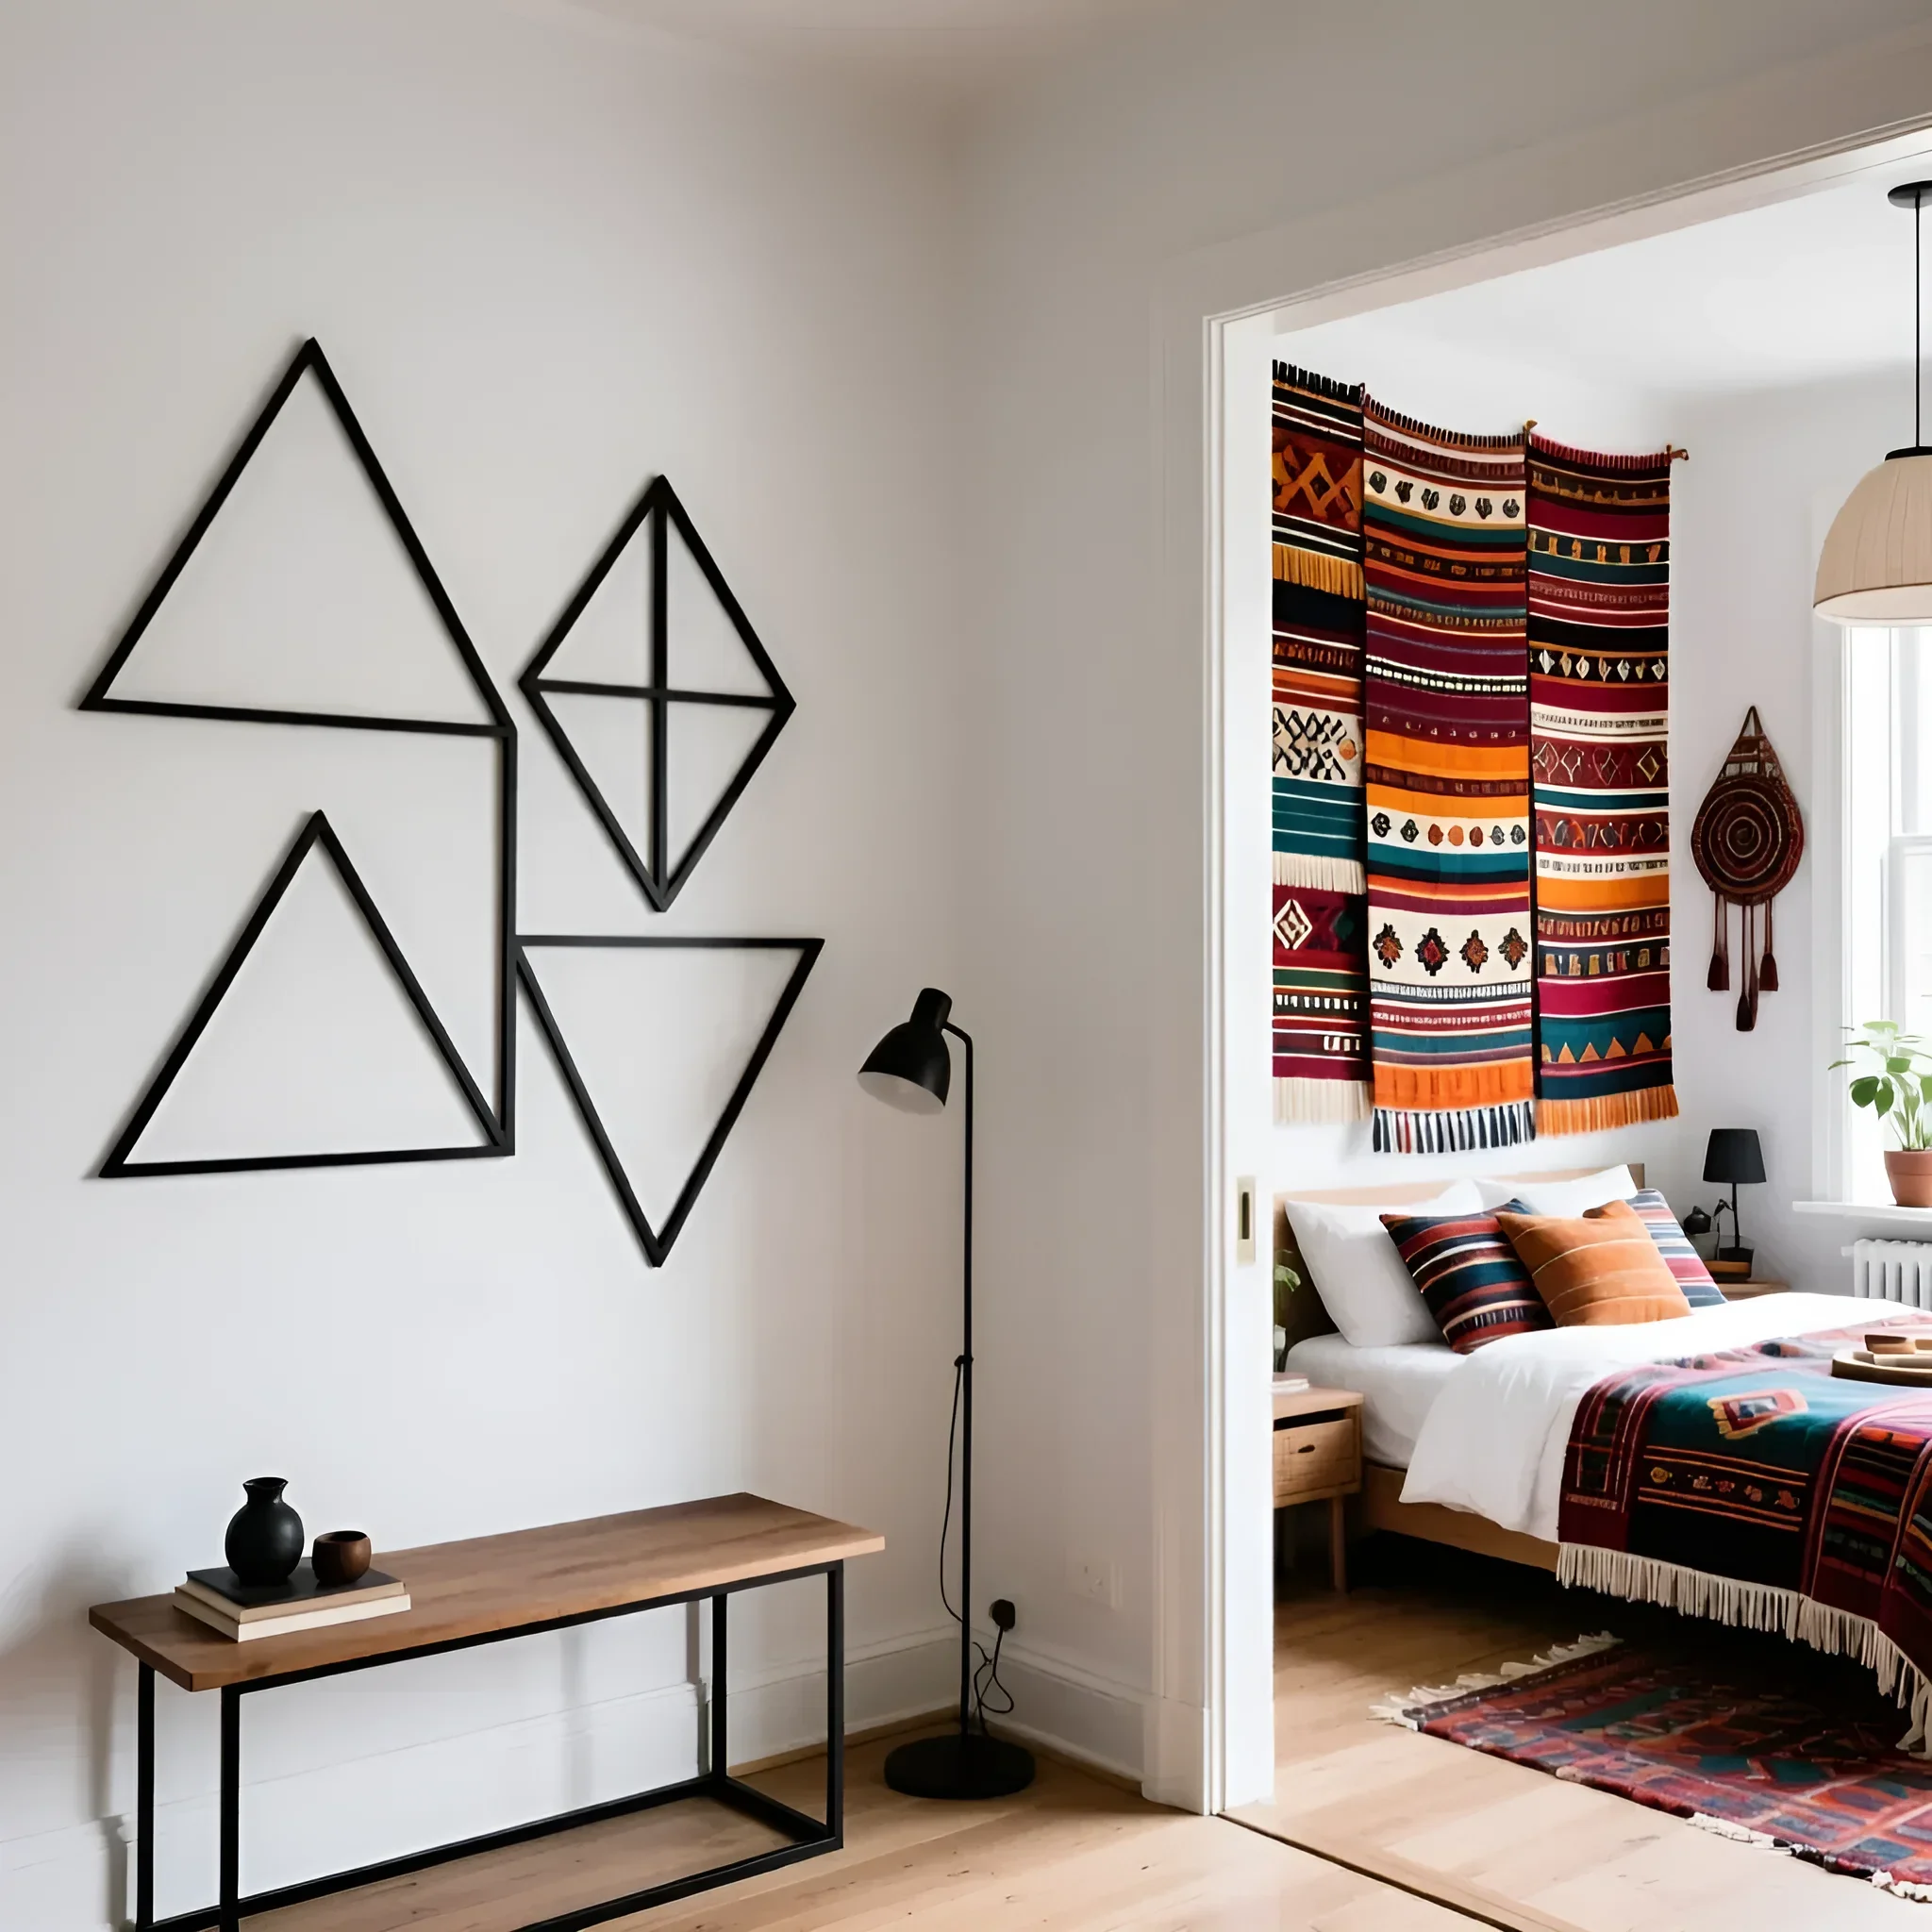
- Scandinavian Style (Scandi): Requires natural materials, light colors, and minimalism. Ideal choices: macrame panels, wooden slices, gallery walls with black-and-white photos (Ideas 2, 5, 10).
- Loft and Industrial: Rough textures, unfinished surfaces, metal. Choose: brick imitation, vinyl record decor, functional pegboard (Ideas 7, 9, 15).
- Minimalism: Clean lines, absence of unnecessary details. Works well: geometric painting (color block), solid-colored volumetric letters, mirror panels (Ideas 1, 6, 12).
- Boho and Ethnic Style: Layering, rich colors, textiles. Suitable: macrame, cork panels, tapestry rugs (Ideas 5, 13, 14).
- Classic and Neoclassical: Symmetry, elegance, relief. Recommended: putty bas-relief, compositions of empty baguette frames (Ideas 8, 11).
Planning and Dimensions: How to Harmoniously Integrate Decor into Space
The most common mistake in DIY decor is incorrect scaling. Too small an element gets lost on a large wall, while too large an element overwhelms the space.
Rules for Scaling Relative to Furniture
If the decor is placed above a large piece of furniture (sofa, dresser, headboard), follow these proportions:
- Two-Thirds Rule: The width of your wall decor (or entire composition) should be approximately 60–75% of the width of the furniture it hangs above. For example, if your sofa is 220 cm wide, your composition should occupy 132–165 cm.
- Center Line: The center of the decorative composition should be at eye level for an average person. This is approximately 145–155 cm from the floor.
- Distance from Furniture: The bottom edge of the decor (or the lowest frame) should be 15–30 cm from the back of the sofa or headboard. This prevents accidental damage and creates visual “air.”
Planning a Gallery Wall
To create a dynamic yet structured gallery wall (as in Idea 4), use the “anchor” and “grid” method:
- Anchor Element: Choose the largest or most important element (the anchor) and place it in the center of the composition (at a height of 145–155 cm).
- Grid: Maintain consistent spacing between all elements. The optimal interval is 5–8 cm. Too large an interval will break up the composition, too small will make it feel cramped.
- Check on the Floor: Always lay out the arrangement on the floor before hammering nails. Photograph the layout for accurate transfer.
Tools and Tricks: Practical Tips for Perfect Execution
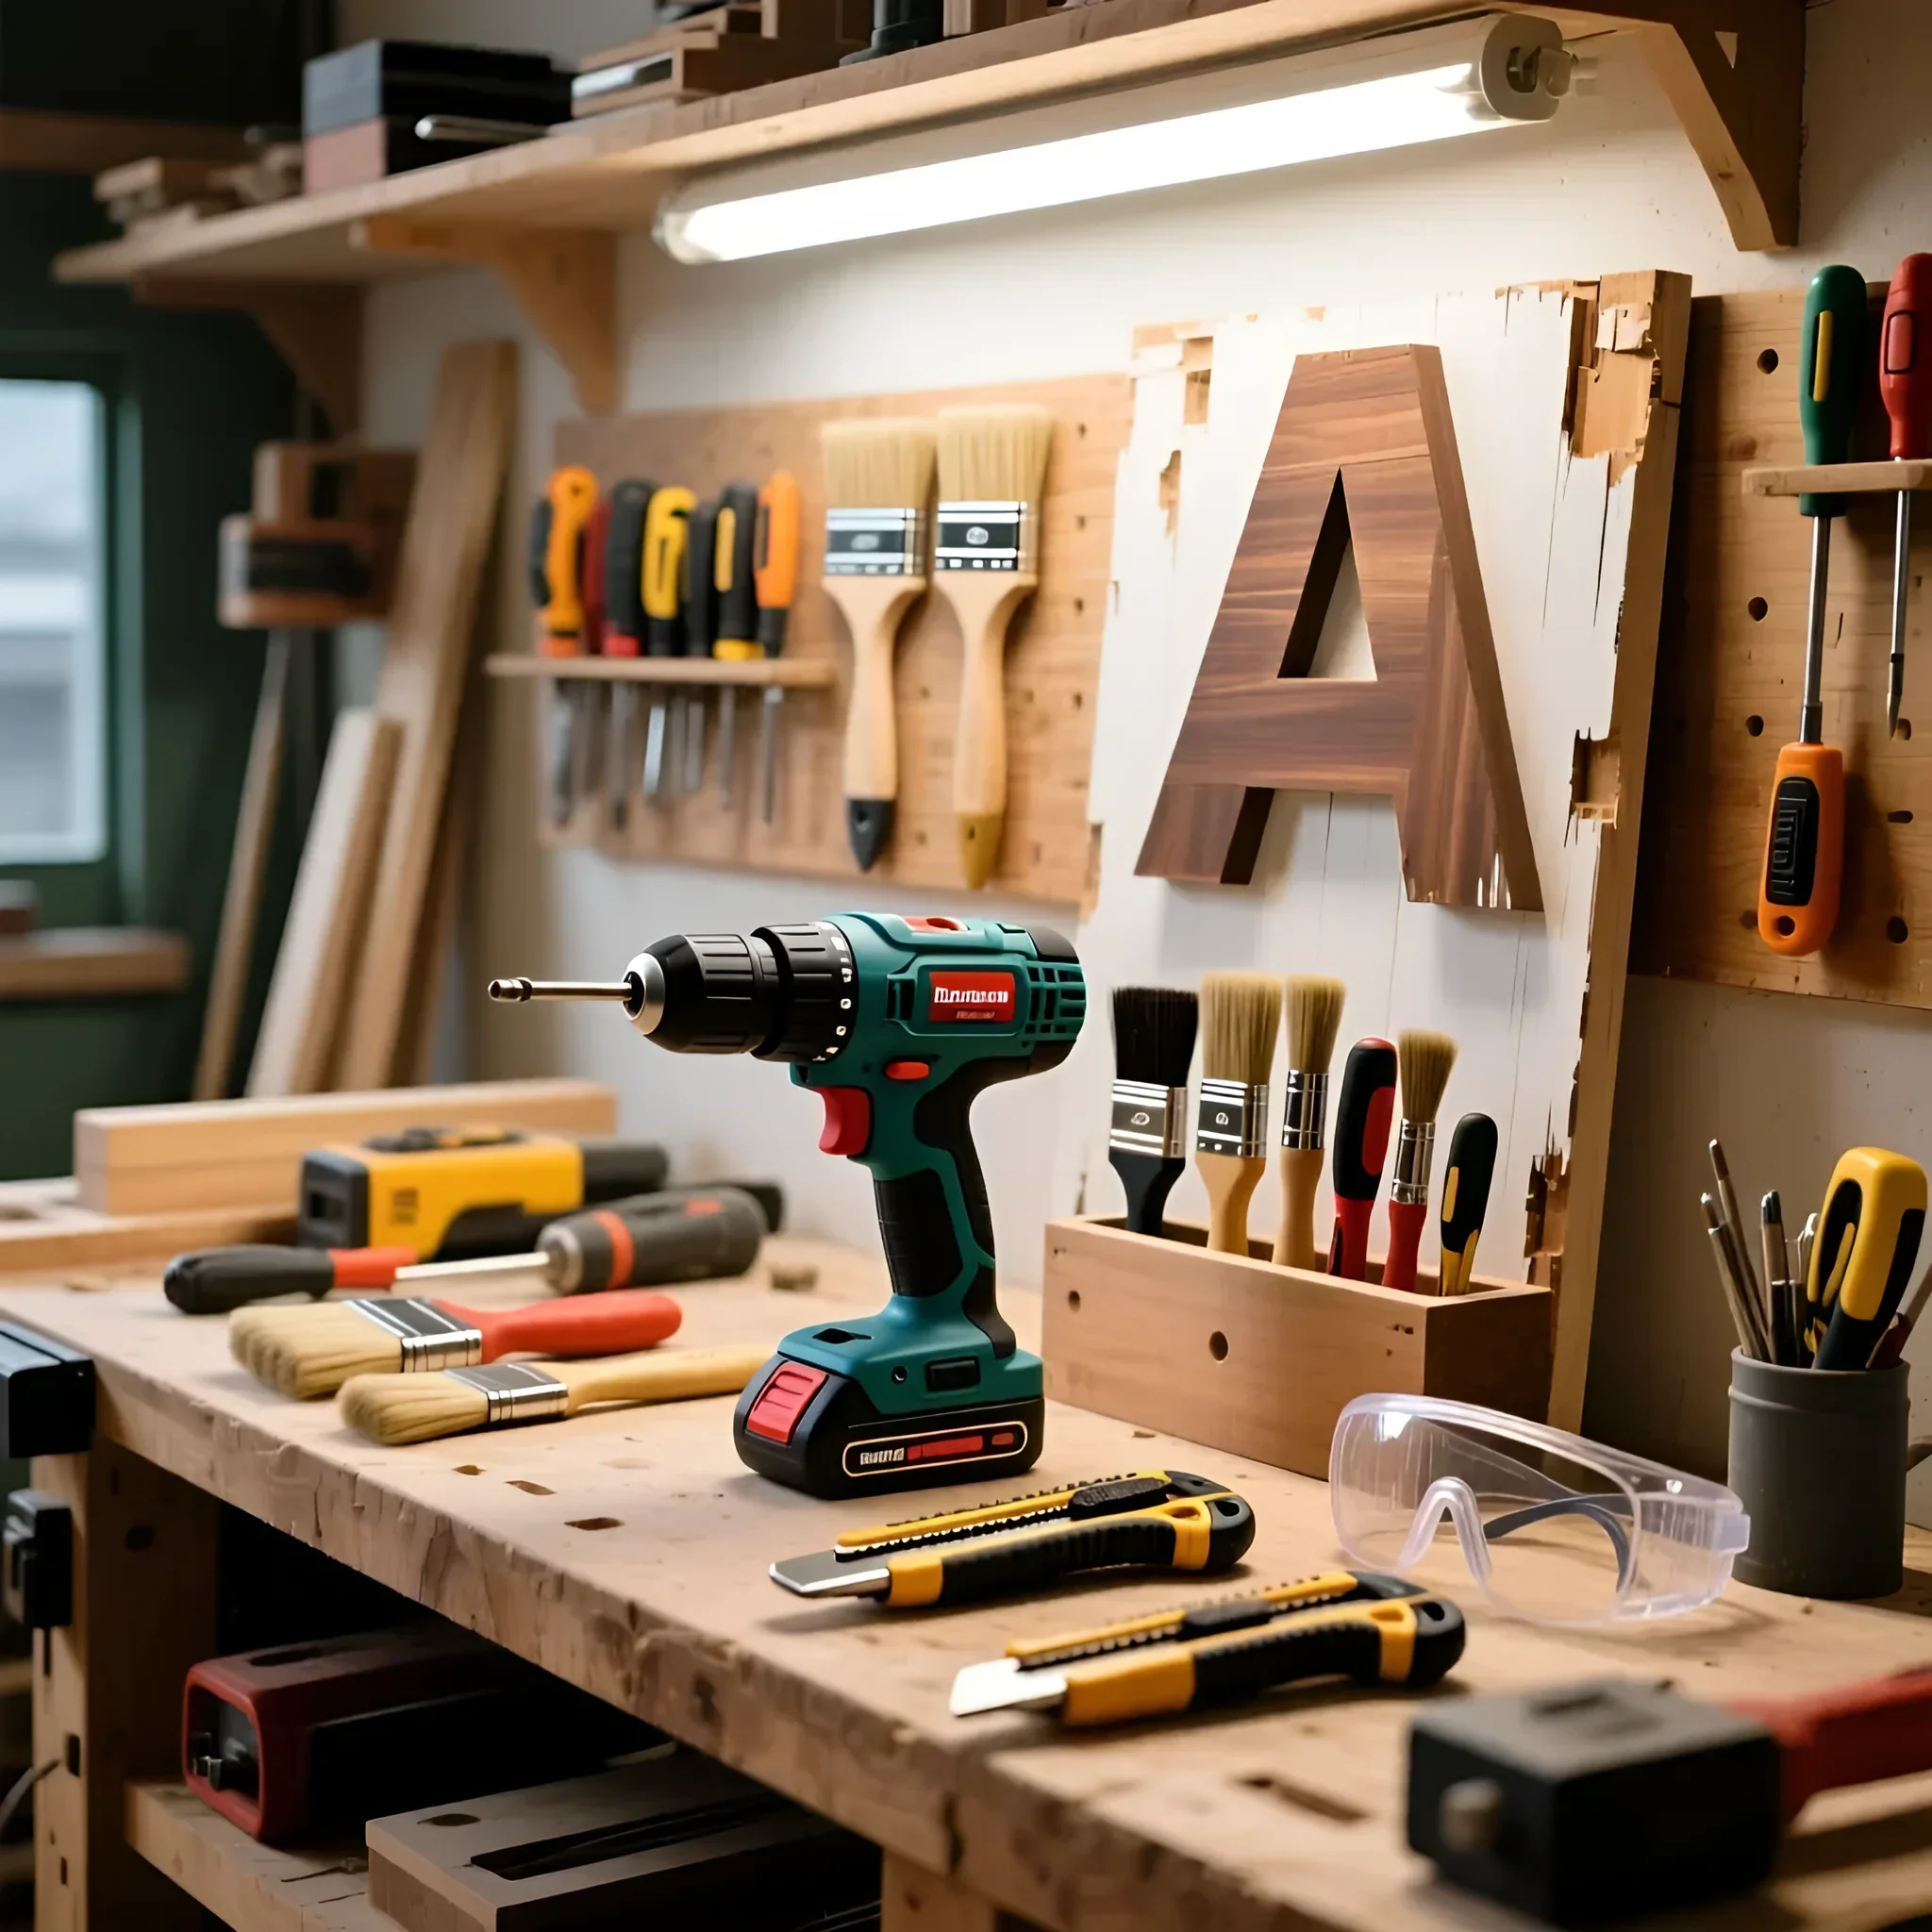
The success of a DIY project depends 50% on the right tools and fastening techniques.
Essential Basic Set
- Measuring Tools: Laser level (critical for geometric painting and galleries), tape measure (at least 5 m), square.
- Fastening: Drill or hammer drill, set of wall plugs and screws (for heavy elements like 3D panels), glue gun (for light decor made of moss, corks, cardboard).
- Consumables: Masking tape (use only high-quality, low-adhesion tape to avoid damaging paint when removing), craft knife with sharp replaceable blades.
Fastening Tricks for Different Wall Types
Wall decor fastening should be adapted to the wall material:
- Drywall: Do not use standard wall plugs. For decor weighing up to 5 kg, use “butterfly” or “molly” type anchors. For light decor (cardboard, macrame), you can use nail-in hooks that leave minimal marks.
- Concrete or Brick: Requires a hammer drill and standard expansion wall plugs. Ensure the screw fully engages the wall plug.
- Wallpaper: When using adhesive (e.g., for 3D panels), you need to cut through the wallpaper and apply the adhesive directly to the wall, otherwise the decor may detach along with the wallpaper layer.
Caring for Homemade Decor: Preserving the Freshness of Ideas
Homemade decor requires a special approach to cleaning, as it can be more fragile than factory-made items.
- Wooden and Painted Elements (Ideas 1, 10, 12): Regularly dust with a soft microfiber cloth or a soft-bristled brush. If the decor is varnished or acrylic painted, you can use a slightly damp (almost dry) cloth.
- Textile and Macrame (Ideas 5, 13): The main problem is dust accumulation. Use a vacuum cleaner on low power with a special narrow attachment or a hairdryer on the cool setting to blow away dust. Washing is generally not possible.
- Preserved Moss (Idea 2): Moss should not be wetted or sprayed. Cleaning should be done very carefully with a dry, soft brush. If the moss starts to dry out, it may indicate too low humidity in the room (below 40%).
- Plaster and Cardboard 3D Panels (Ideas 3, 8, 15): Dust accumulates in the relief. Use a soft brush or compressed air (like for cleaning electronics). If the item is not coated with protective varnish, avoid wet cleaning.
Protection Against Fading
If your decor (especially paper or textile) is exposed to direct sunlight, use protective coatings. For paints, this could be acrylic varnish with a UV filter (matte or gloss). For photos and prints, choose frames with UV-protective glass.
Frequently Asked Questions (FAQ) About DIY Wall Decor
1. How long does it take to create a complex bas-relief?
Creating a bas-relief (Idea 8) takes at least 3-5 days. This is due to technological pauses: priming (12 hours), applying the main relief (depends on complexity), drying (24-48 hours), finishing, and painting.
2. How can I create impressive decor on a budget?
The most budget-friendly ideas are geometric painting (requires only tape and leftover paint), as well as decor made from cardboard or wine corks. The cost of materials for a 60×60 cm cardboard panel rarely exceeds 500-700 rubles, including paint.
3. Can I use a hot glue gun to attach heavy elements?
No. Hot glue is only suitable for light elements (moss, cardboard, thin textiles) that are attached to a vertical surface. For anything weighing more than 500 grams, use specialized construction adhesives (“liquid nails”) or mechanical fasteners (wall plugs).
4. What should be the distance between elements in a gallery wall if the ceilings are very high (3 meters)?
With high ceilings (over 2.8 m), you can slightly increase the standard spacing between elements (5-8 cm) to 10-12 cm. This helps the composition not to look too small against the large vertical space. The main thing is to keep the center of the composition at eye level (150–160 cm).