Designing a small kitchen (4–8 m²) is one of the most challenging tasks in interior design. Here, every centimeter must work for you. The goal is not just to fit in the necessary appliances and cabinets, but also to create an ergonomic, safe, and visually pleasing space. As professional furniture experts for mebeltops.com, we have prepared the most detailed guide to choosing and arranging a kitchen set that will help transform a cramped space into a functional center of your home.
Types and Styles of Kitchen Sets for Small Spaces
Choosing the right type of kitchen set is 80% of success in planning a small kitchen. Standard U-shaped or island solutions are not applicable here. Our task is to minimize walkways while preserving the work triangle.
1. Linear (Single-Row) Kitchen Set
Ideal for narrow and long kitchens (less than 2 meters wide). All functional zones (sink, stove, refrigerator) are located along one wall. This leaves maximum free space for the dining area or walkway.
- Optimal length: 180–300 cm. If the length is less than 180 cm, you will have to use compact appliances (e.g., a 2-burner hob).
- Advantage: minimal floor space requirement, low cost due to simple design.
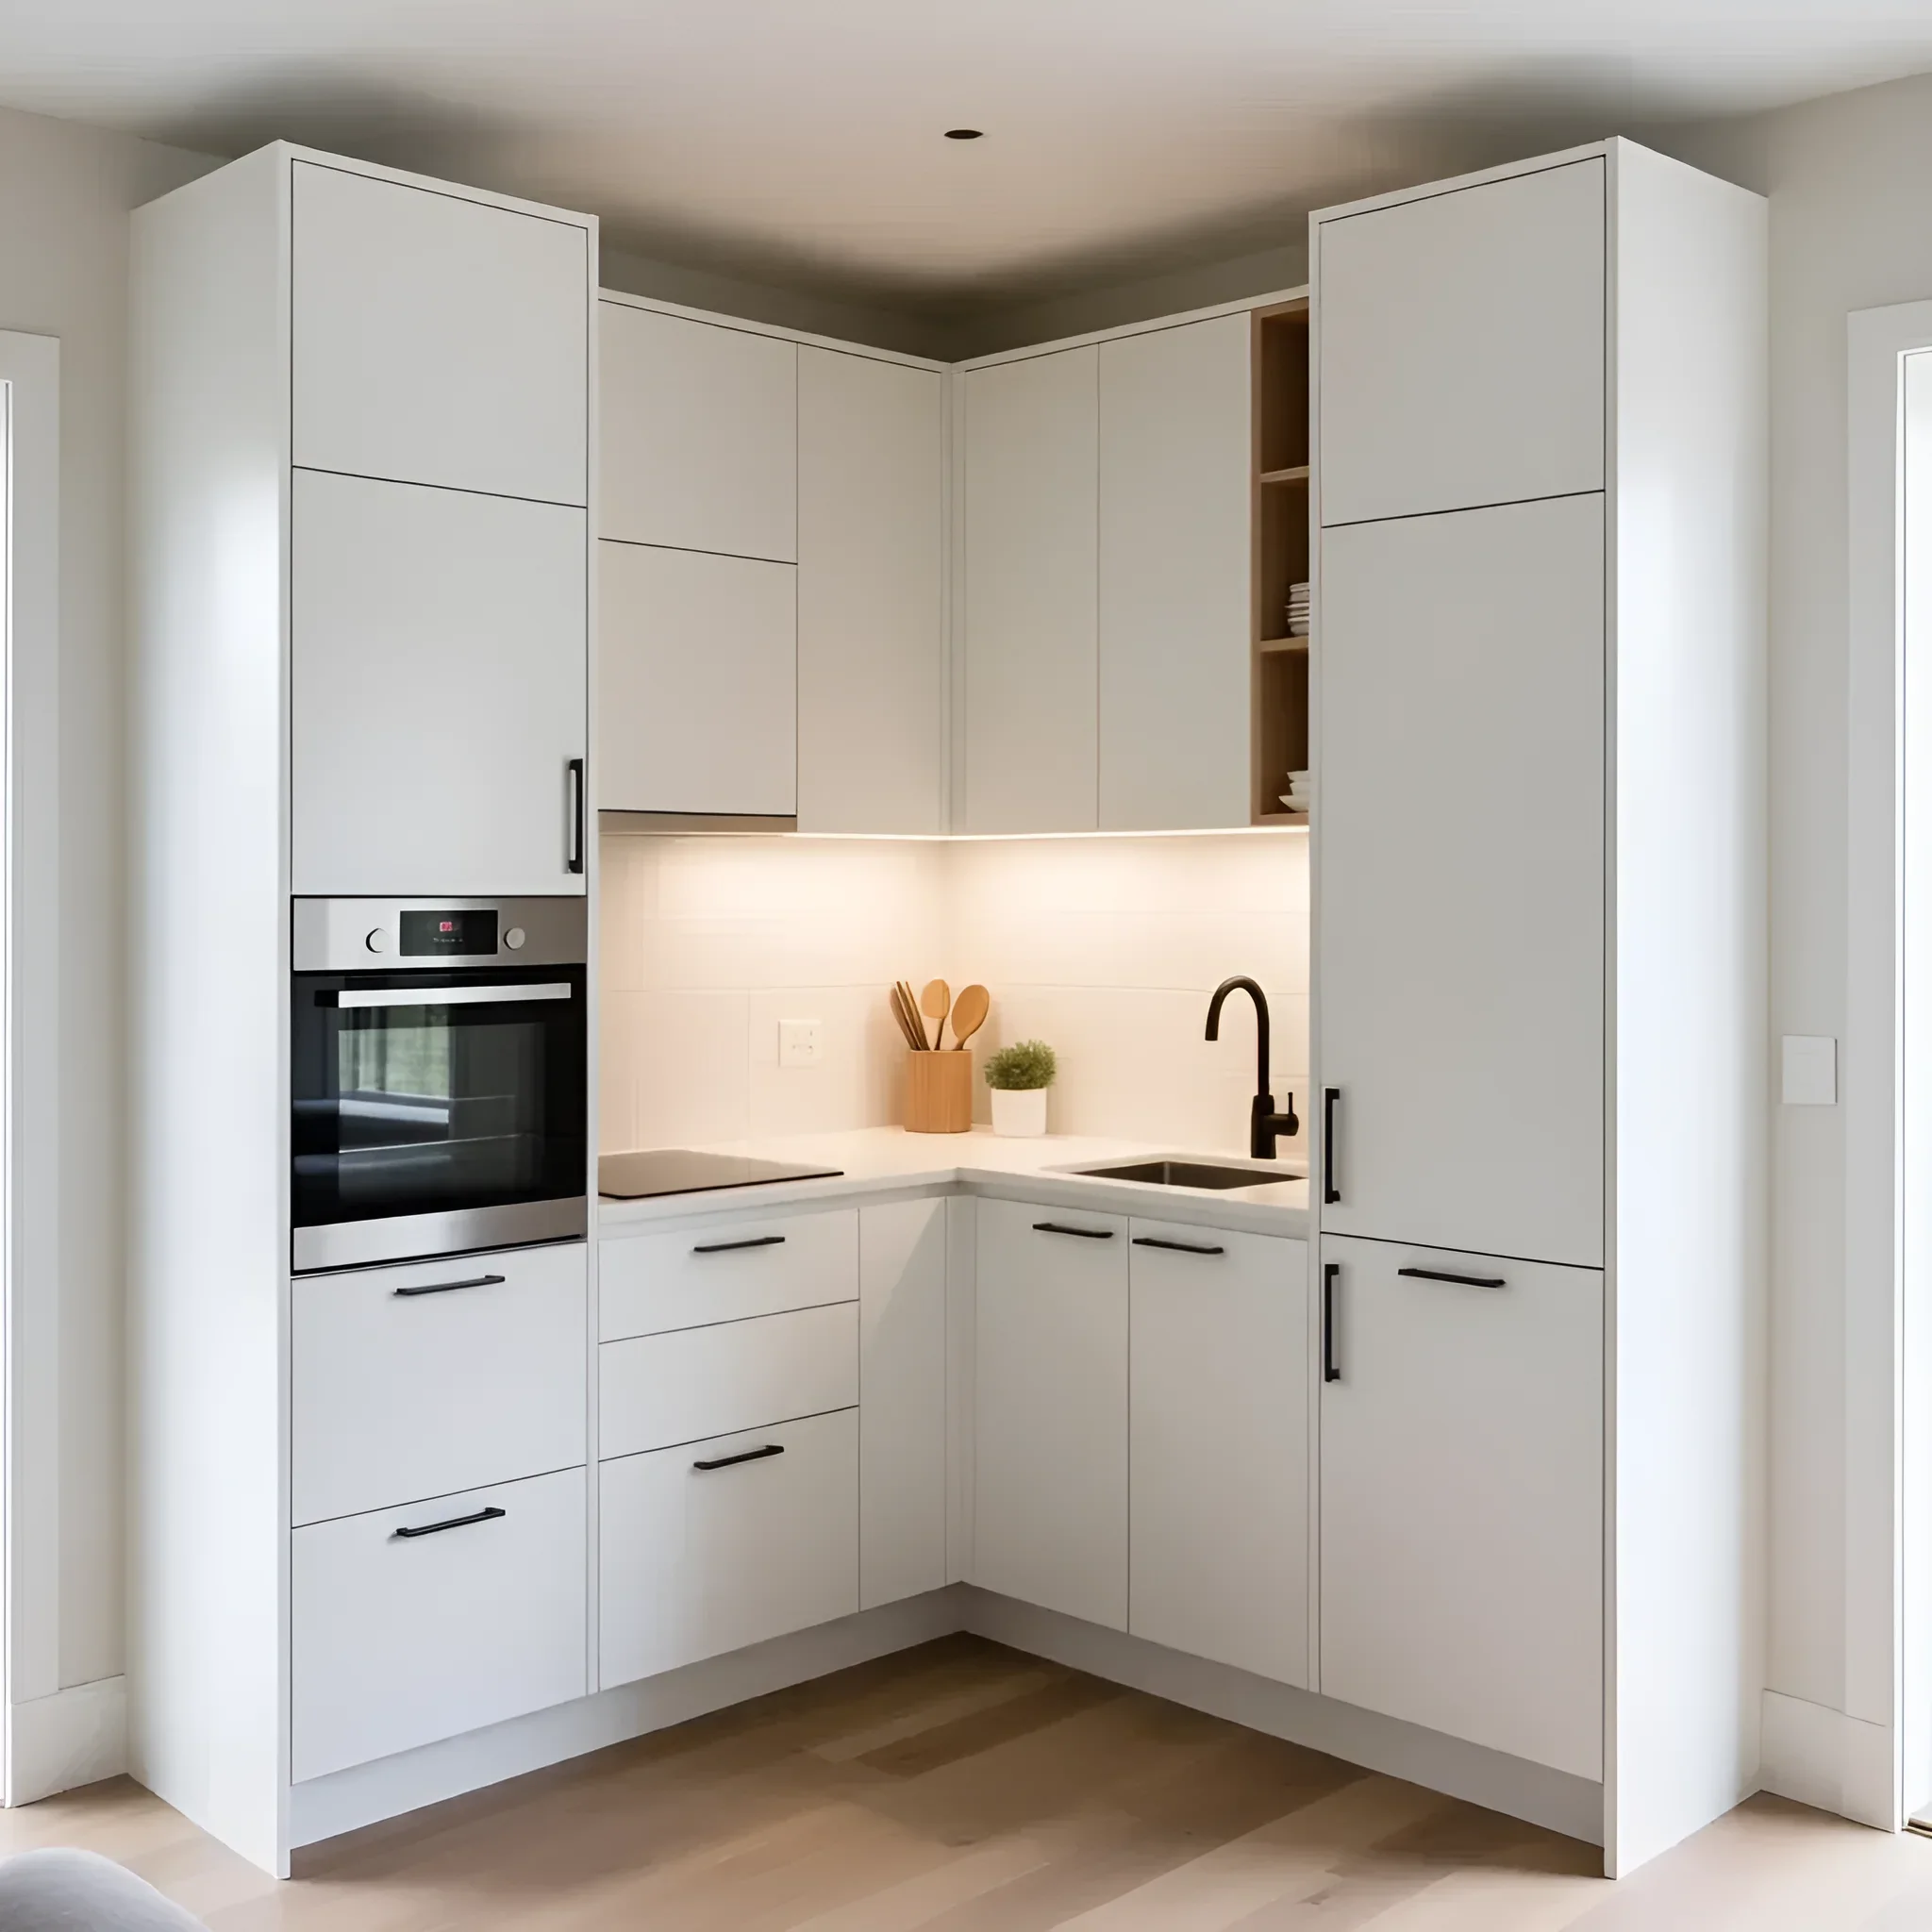
2. L-Shaped (Corner) Kitchen Set
The most popular and effective solution for square or almost square small kitchens (from 6 m²). The corner layout allows you to utilize two adjacent walls, maximizing the use of corner space (which is usually wasted).
- Minimum side dimensions: 150 cm x 180 cm. The corner is most often occupied by the sink or a special corner storage module (“magic corner”).
- Ergonomics: allows for the creation of a classic work triangle, which reduces the hostess’s movements.
3. Two-Row (Parallel) Kitchen Set
Suitable for very long and narrow kitchens where a dining area cannot be accommodated (e.g., in a corridor-type layout). Cabinets and appliances are installed along two opposite walls.
- Critical parameter: the width of the passage between the rows. It must be at least 120 cm (for comfortable cabinet opening and safe work). If the passage is less than 100 cm, this option is not suitable.
- Layout: usually the “wet” and “hot” zones (sink and stove) are placed on one side, and storage and the refrigerator on the opposite side.
Materials and Finishes: What to Choose for a Compact Kitchen
In a small room, materials perform not only a practical but also a visual function. Proper finishing helps to “lighten” the furniture and reflect light, making the kitchen feel more spacious.
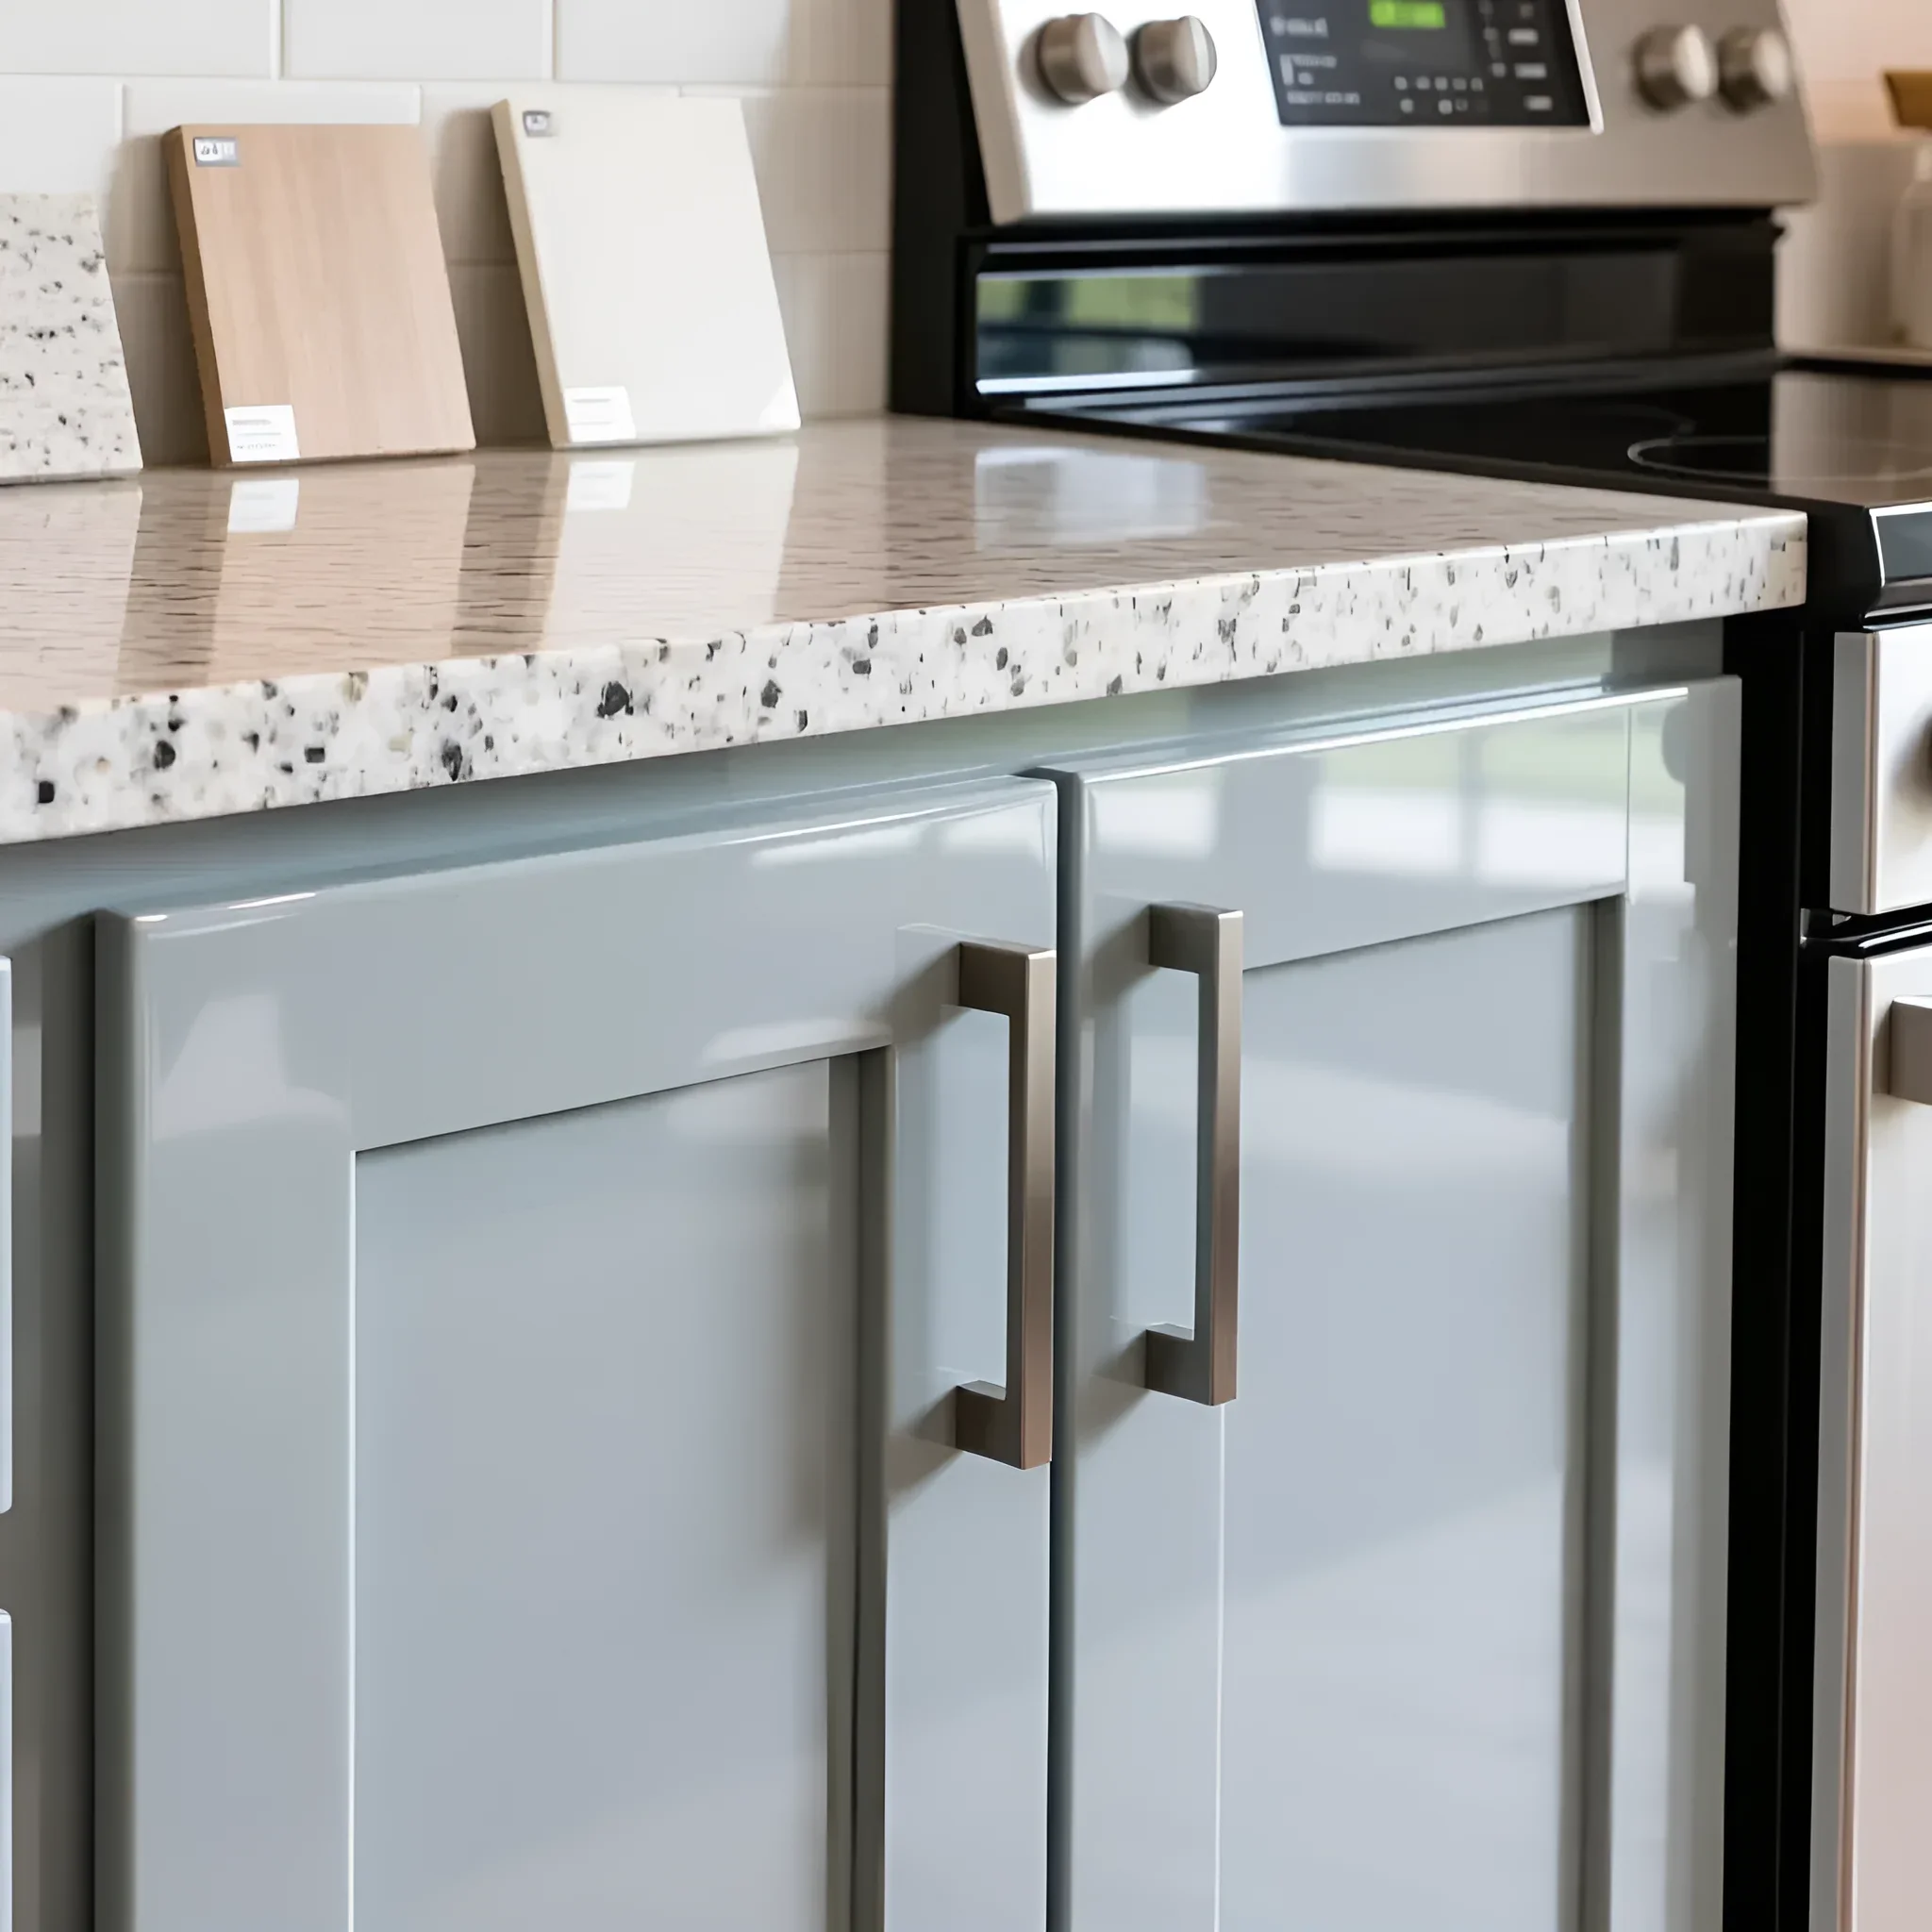
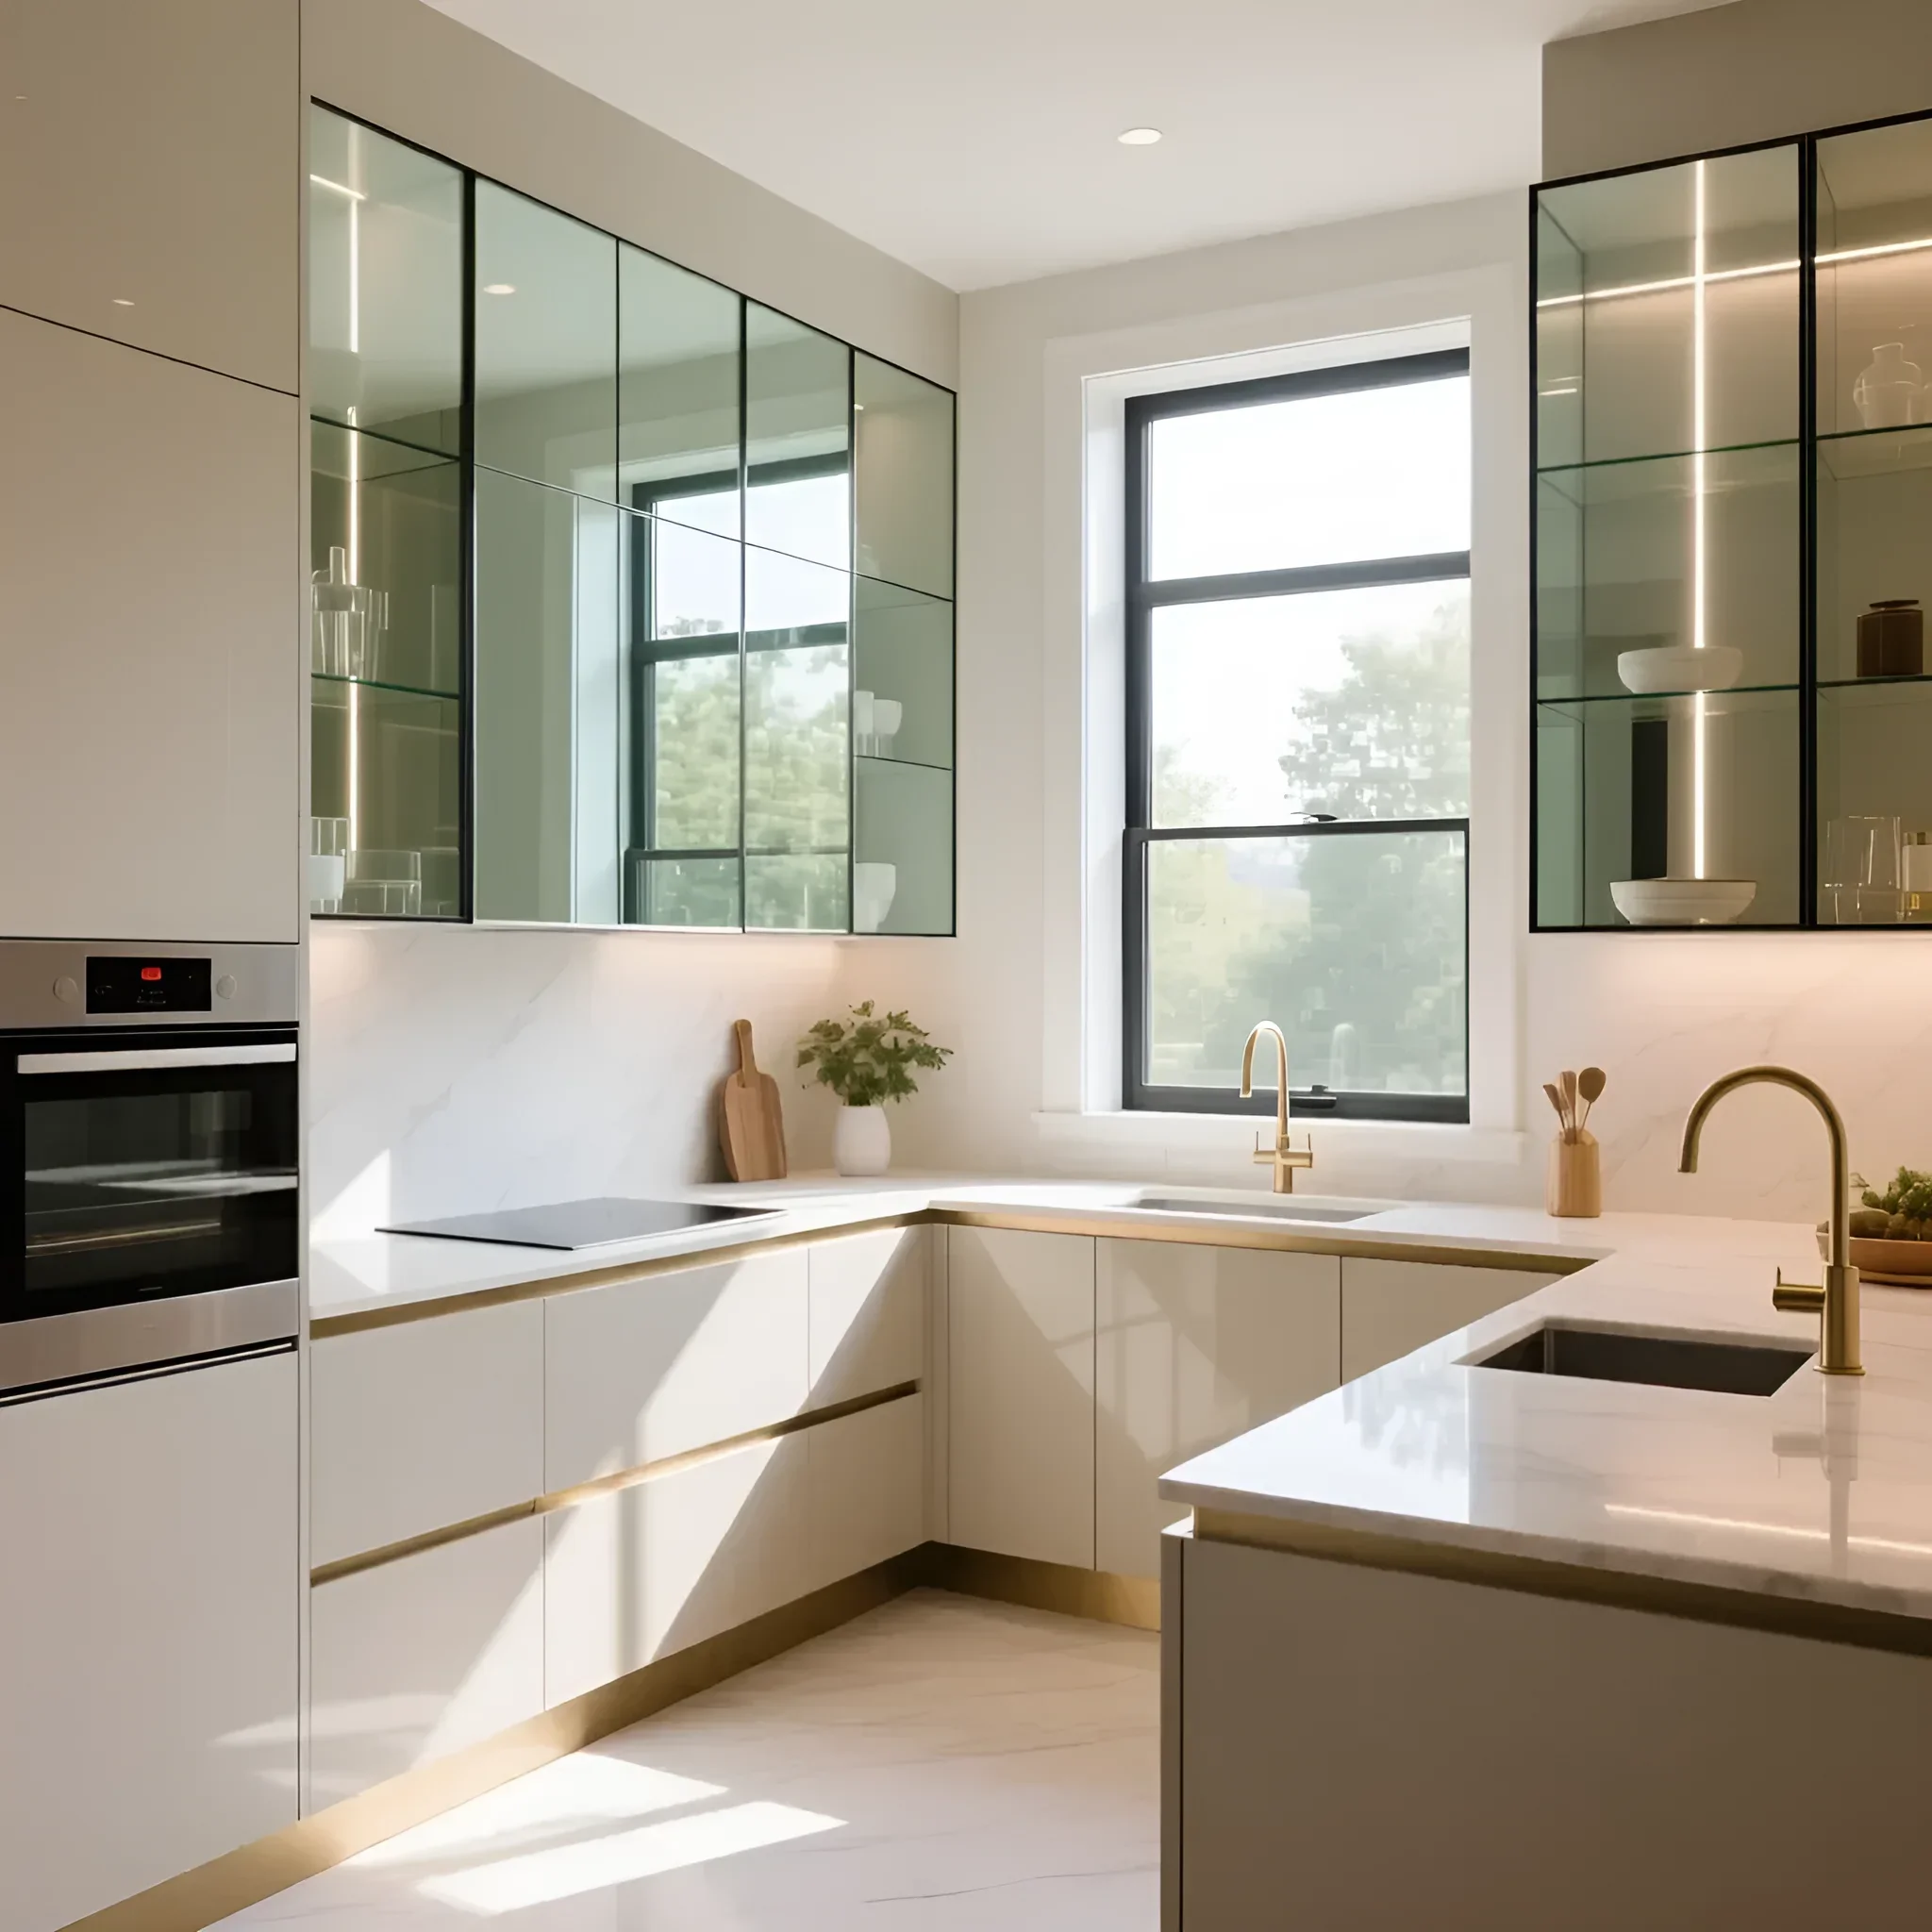
1. Fronts: Bet on Gloss and Light Colors
Glossy or semi-glossy fronts reflect light, which is a key technique for visual expansion. Choose light, neutral shades: white, light gray (greige), beige, or a light wood shade (e.g., bleached oak).
- Acrylic and HPL plastic: have a high gloss, are moisture-resistant, and easy to clean. An ideal choice for a small kitchen where usage intensity is high.
- Enamel: allows for a rich, yet light color, while the surface is easy to clean. Disadvantage: sensitivity to mechanical damage.
- MDF with PVC film: a budget-friendly option. It is important to choose a high-quality film to avoid peeling due to temperature fluctuations near the stove.
Avoid: fronts with milling (they accumulate dirt), dark matte wood, heavy textures. They “eat up” light.
2. Countertops: Thin and Practical
The traditional countertop thickness (38–40 mm) can look bulky in a compact space. It is recommended to use thinner options:
- Compact laminate (HPL): thickness 10–12 mm. Looks minimalist, very durable, and moisture-resistant. Ideal for modern design.
- Artificial stone (acrylic or quartz conglomerate): thickness 20 mm. Allows for seamless installation with the sink, which is critical for hygiene in a limited space.
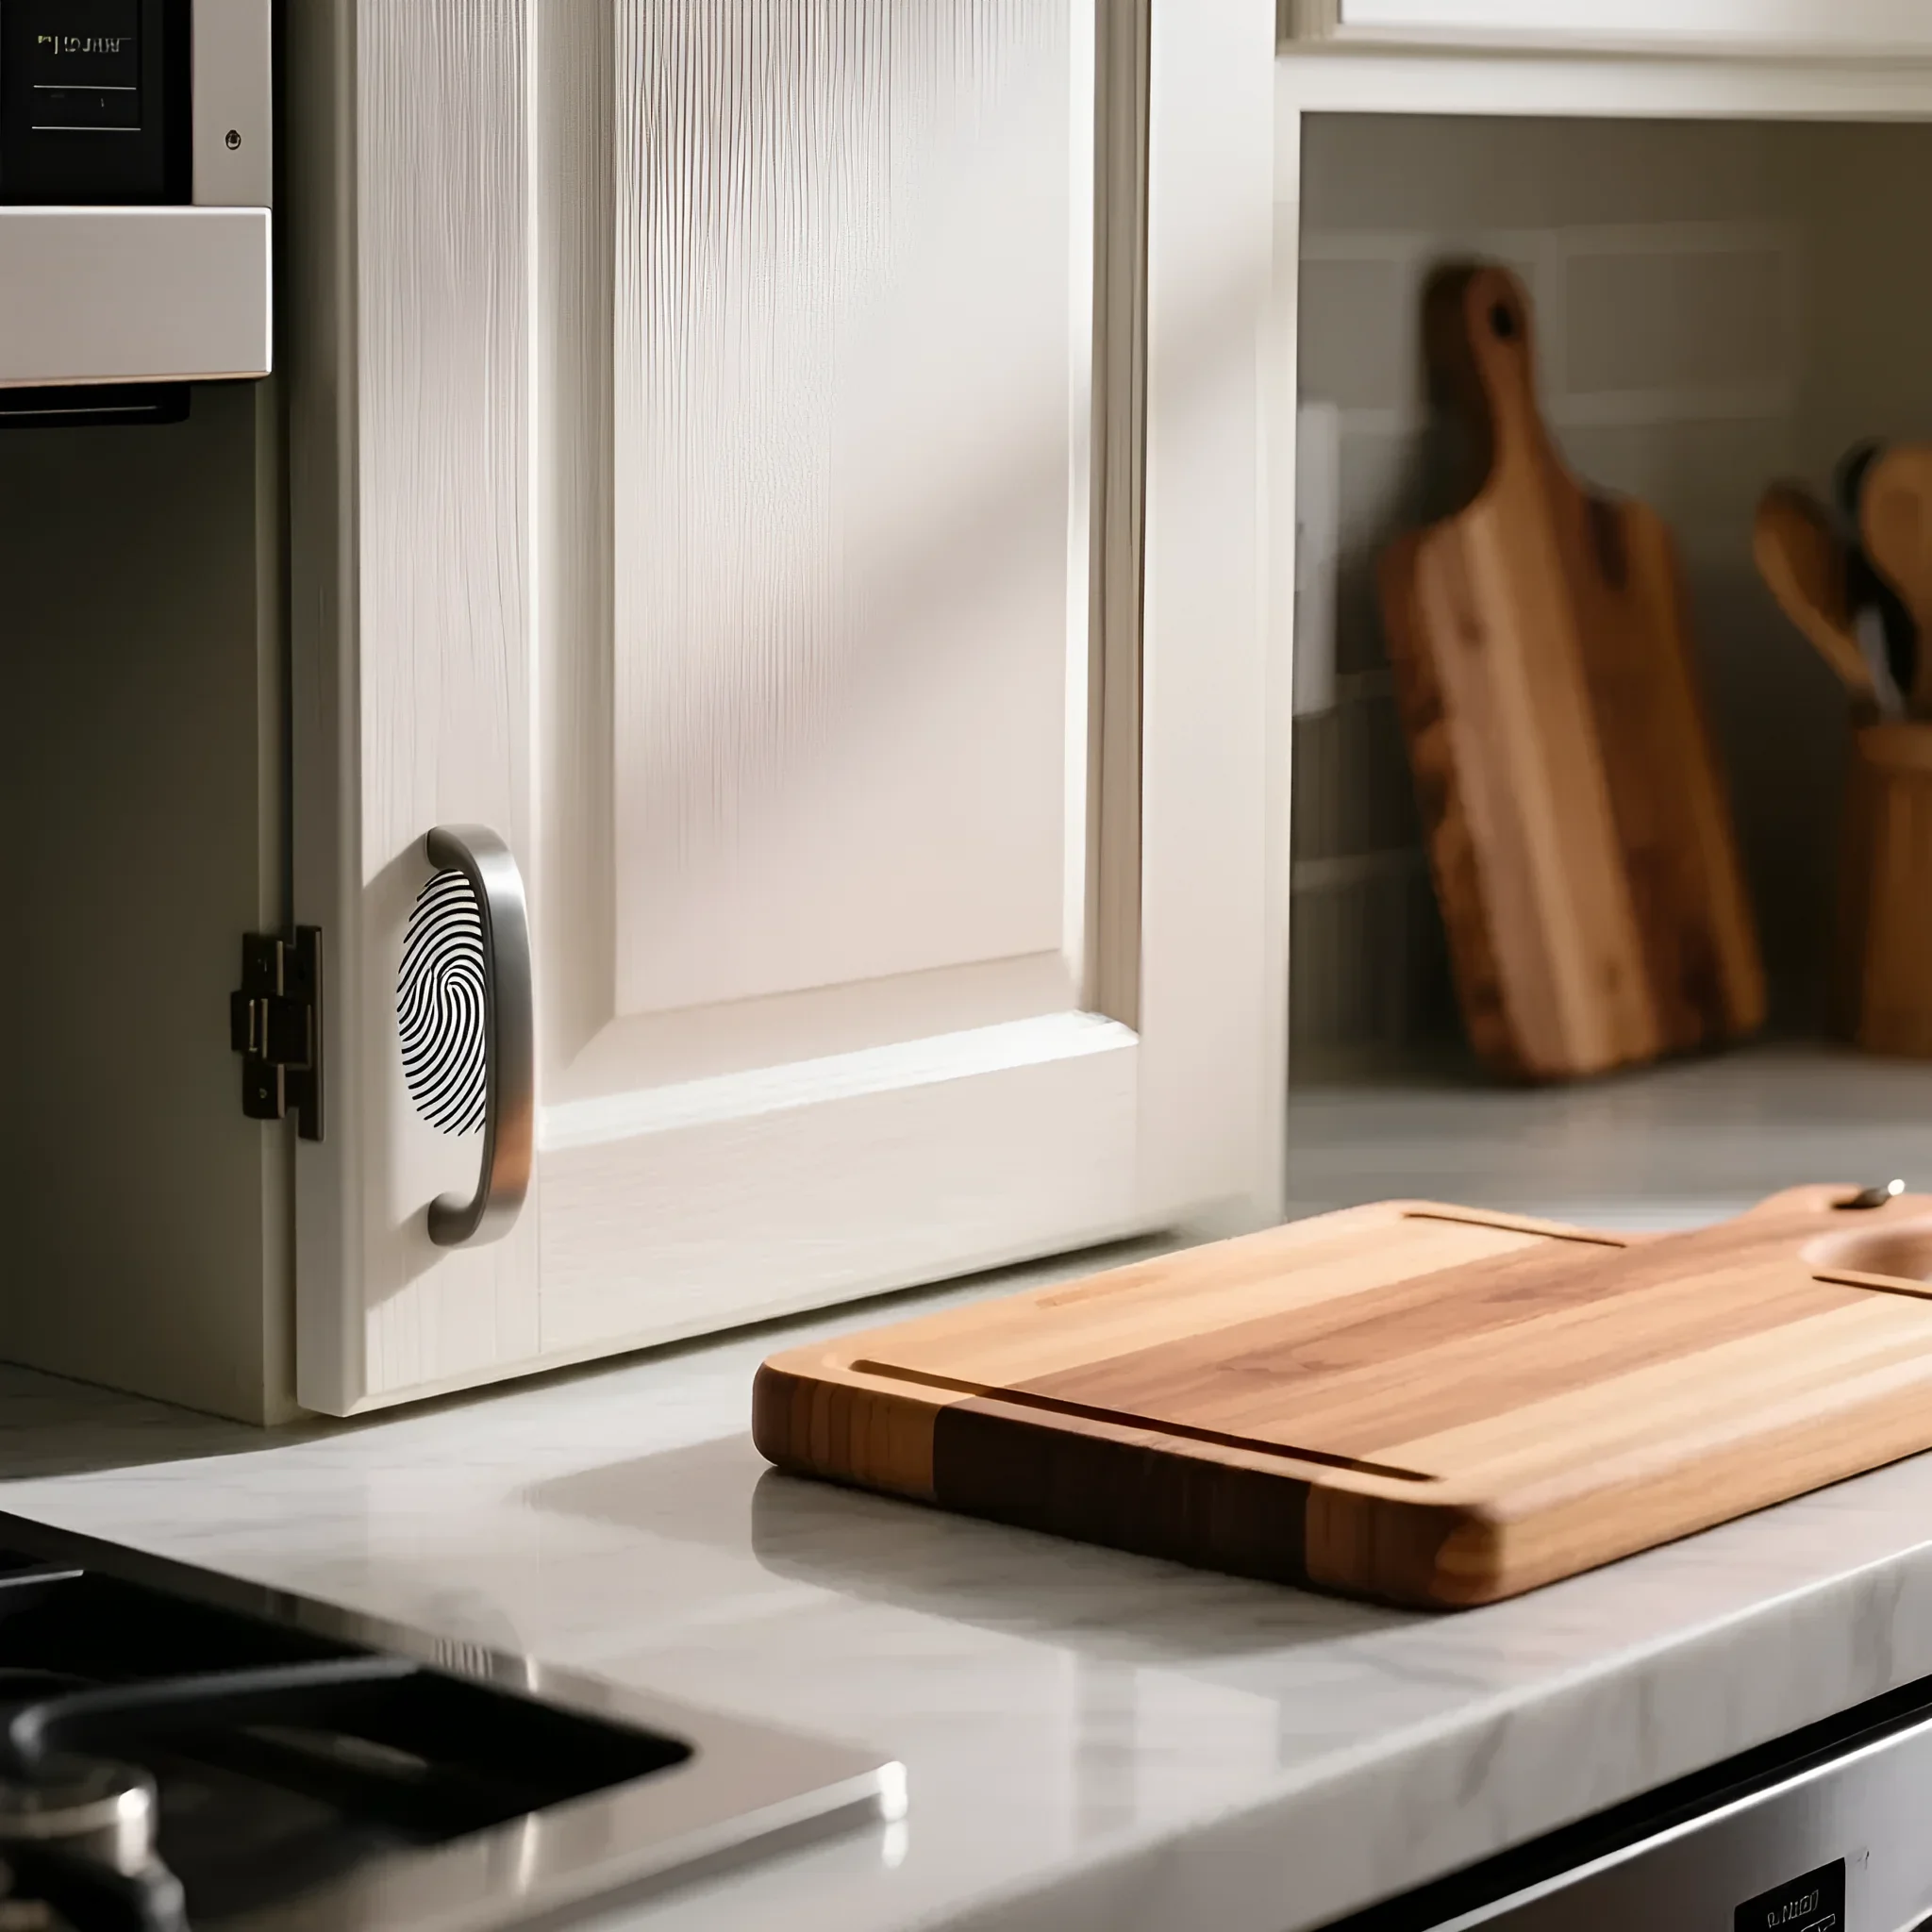
3. Hardware: Minimalism and Integration
Refrain from using bulky handles. They visually overload the space and can interfere with movement. Use:
- Profile handles (Gola profile): integrated into the edge of the facade. Create the effect of a monolithic, smooth surface.
- Push-to-open systems: opening by pressing. Require careful use, as fingerprints remain on glossy surfaces, but they greatly simplify the look of the kitchen.
How to Arrange Furniture in a Small Kitchen: Basic Planning Principles
Effective arrangement is based on two pillars: adherence to the work triangle (or line) principle and correct placement of large appliances.
1. The Work Triangle Principle (Adaptation for Small Spaces)
Ideally, the distances between the vertices (Refrigerator – Sink – Stove) should be minimal, but sufficient for comfortable work. In a small kitchen, this triangle often transforms into a work line.
- Sink: should be located in the center of the work area. This is the most frequently used element.
- Stove (hob): should be separated from the sink and refrigerator by a work surface. Critical minimum: 40 cm of free space on each side of the stove for safety and convenience.
- Refrigerator: placed at the end of the line, preferably near the entrance. This allows family members to use it without intruding into the work area. Important: do not place the refrigerator directly next to the stove or oven, as this increases its energy consumption and reduces its lifespan.
2. Ergonomics and Storage Zones
Use the principle of “from frequent to rare”:
- Lower tier (working): storage of heavy dishes, pots, cutlery (in the upper drawers).
- Middle tier (accessible): main products, spices, frequently used dishes (at eye level).
- Upper tier (rare): seasonal or rarely used appliances, food supplies.
Tip: if you are using an L-shaped layout, it is better to allocate the corner cabinet for storage rather than for installing the stove or sink, as access to utilities in the corner is more difficult.
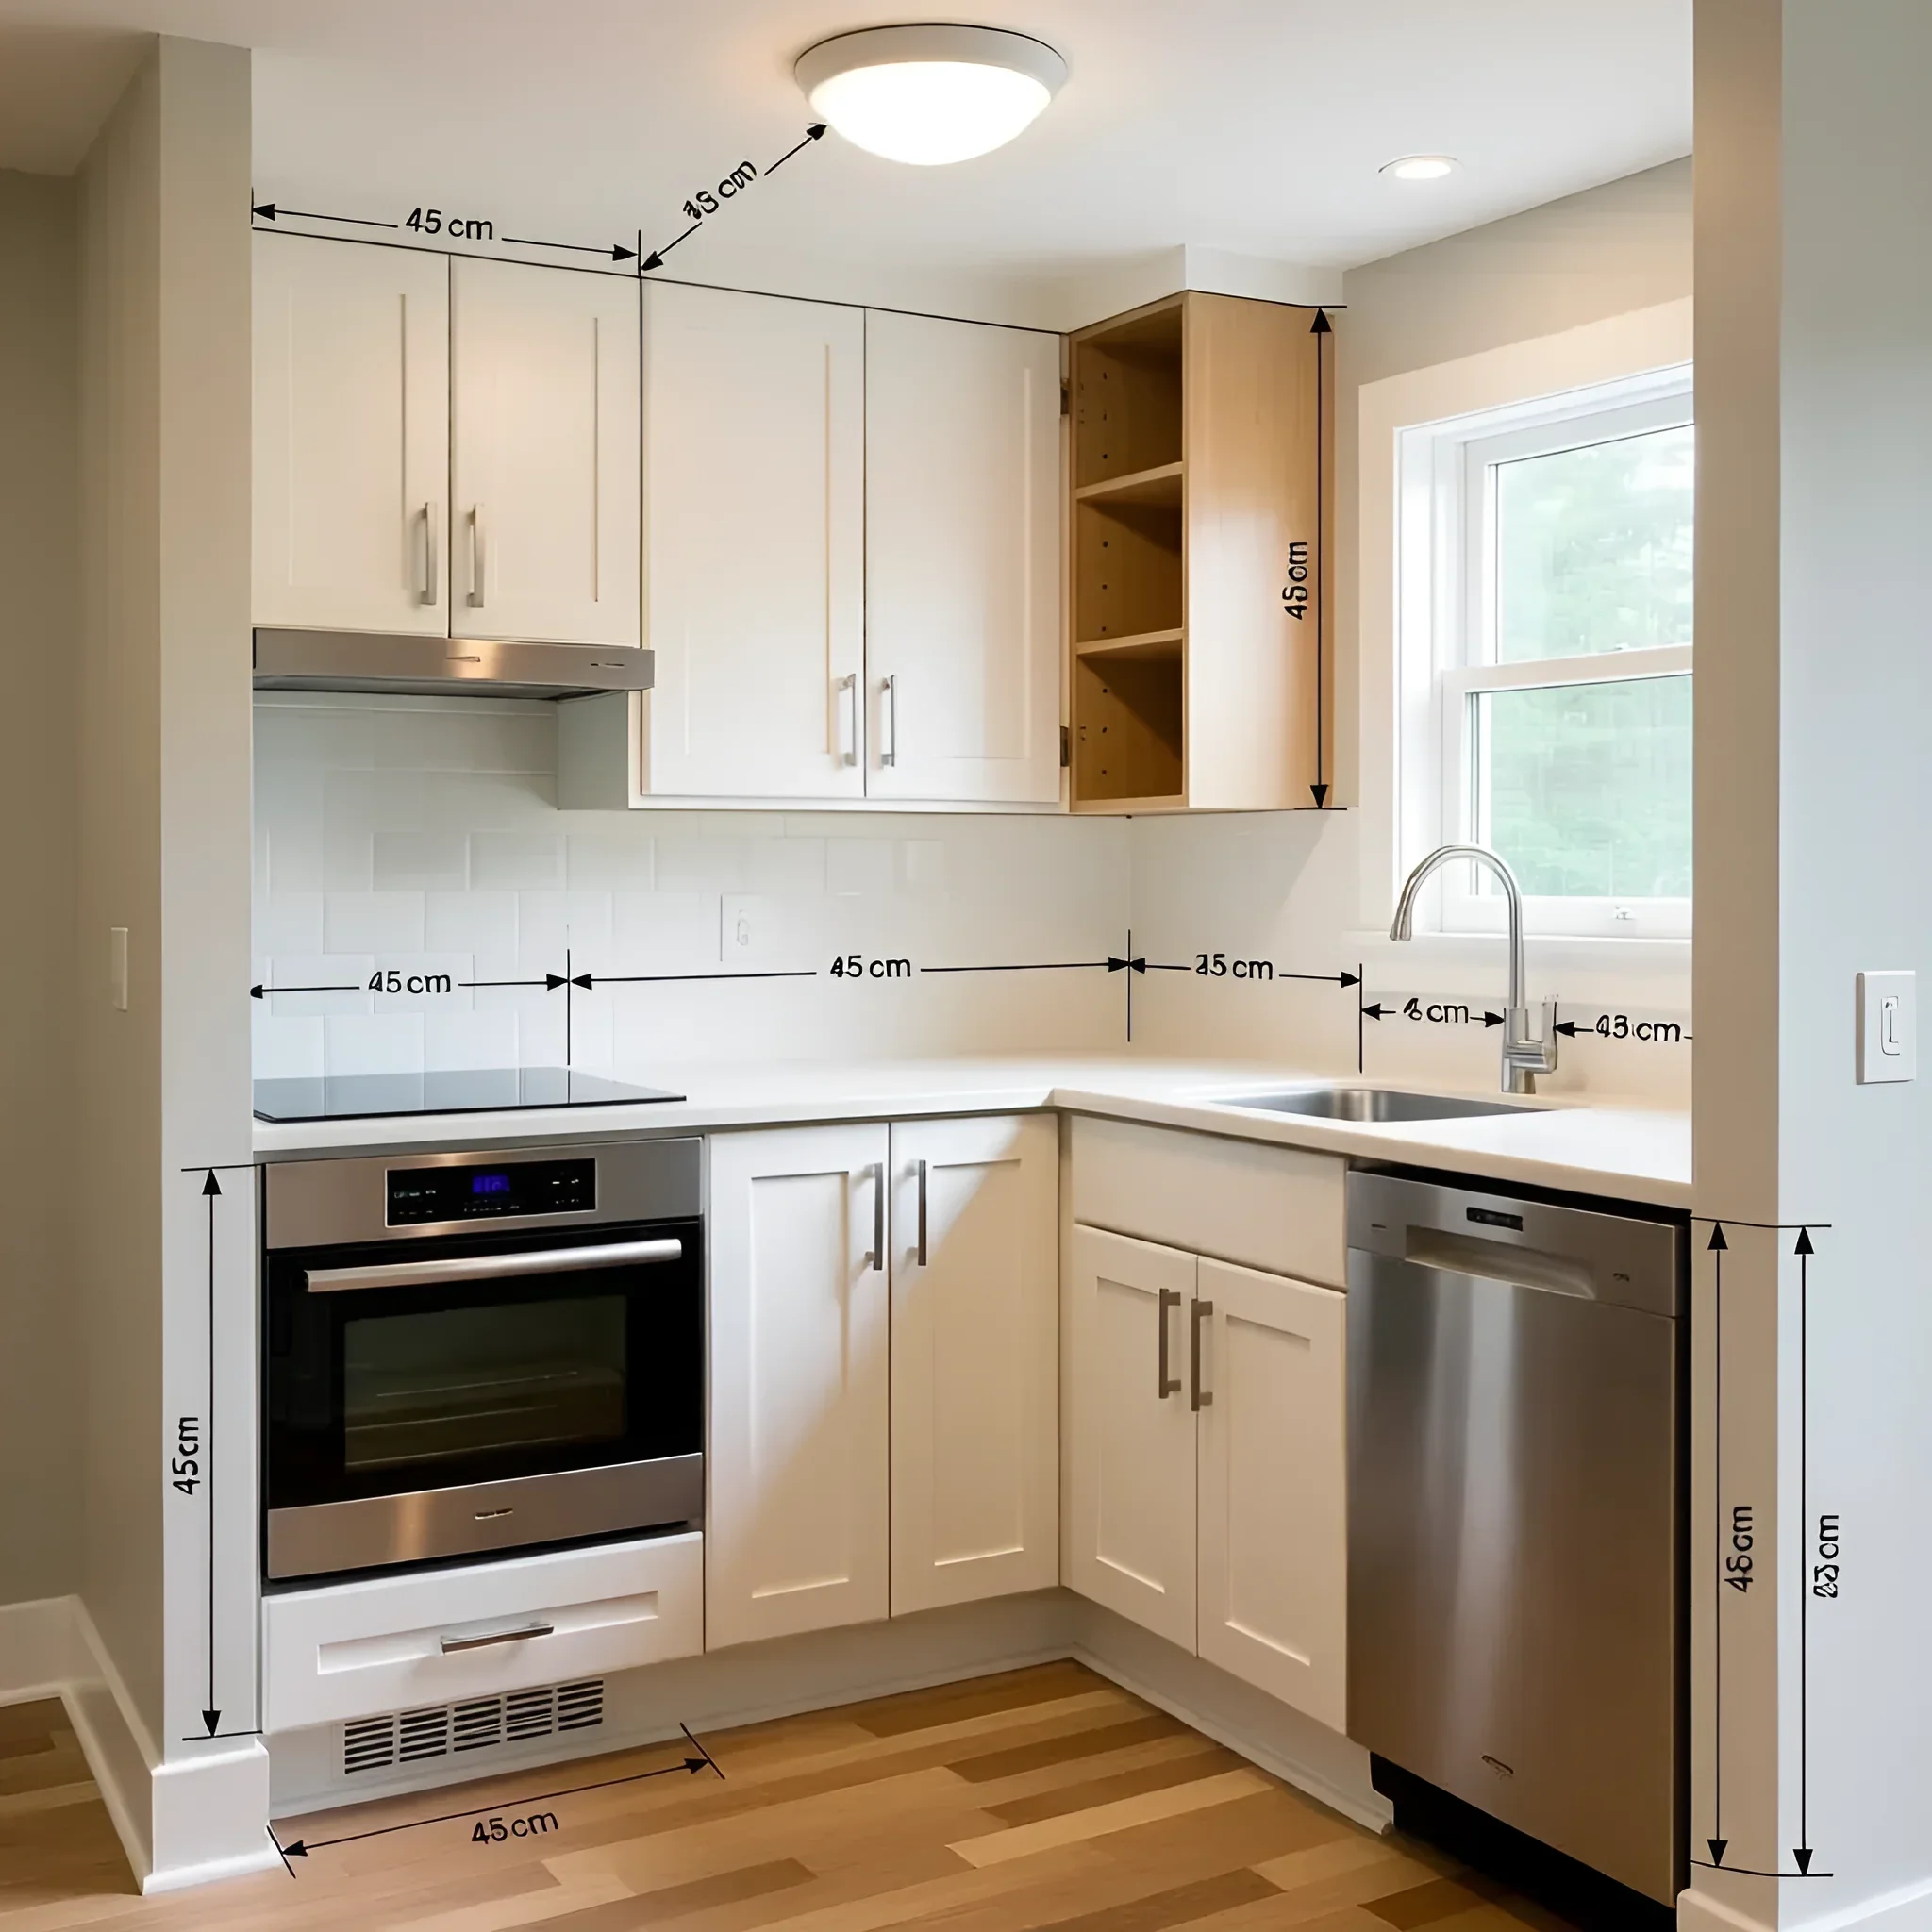
Optimal Sizes and Dimensions: Choosing Furniture by Area
Standard kitchen module sizes are designed for spacious rooms. For a small kitchen, we recommend using non-standard, reduced dimensions to maintain passage.
1. Depth of Lower Cabinets
The standard depth of lower modules (including the front) is 600 mm. This leaves a passage of 60–80 cm in very small kitchens.
- Optimal for 5–6 m²: reduced depth of 450 mm. This allows you to gain 15 cm of passage. Standard small appliances fit on such a countertop, and the sink can be chosen with a smaller diameter (45–50 cm).
- Note: with a depth of 450 mm, you will only be able to install compact built-in appliances (45 cm oven, 45 cm dishwasher), or use freestanding models.
2. Height of Upper Cabinets
In a small kitchen, it is necessary to maximize the use of vertical space. Instead of standard upper cabinets with a height of 720 mm, choose models of 900 mm or 1200 mm (up to the ceiling).
- Advantage: cabinets up to the ceiling eliminate dust accumulation on top, create the effect of a single wall, and provide 30–50% more useful storage volume.
- Recommendation: if the ceiling height allows (more than 260 cm), use mezzanines (a second tier of upper cabinets) with separate opening.
3. Compact Appliances (Dimensions)
| Appliance | Standard Size (Width, cm) | Compact Size (Width, cm) | Comment |
|---|---|---|---|
| Hob | 60 (4 burners) | 30–45 (2–3 burners) | Frees up to 30 cm of work surface. |
| Dishwasher | 60 | 45 | Models for 9–10 place settings. Enough for a family of 3–4 people. |
| Oven | 60 (full-size) | 45 (compact) | Often combined with microwave function, saving countertop space. |
| Refrigerator | 60–90 | 45 (built-in) | A 45 cm built-in refrigerator allows for a unified facade. |
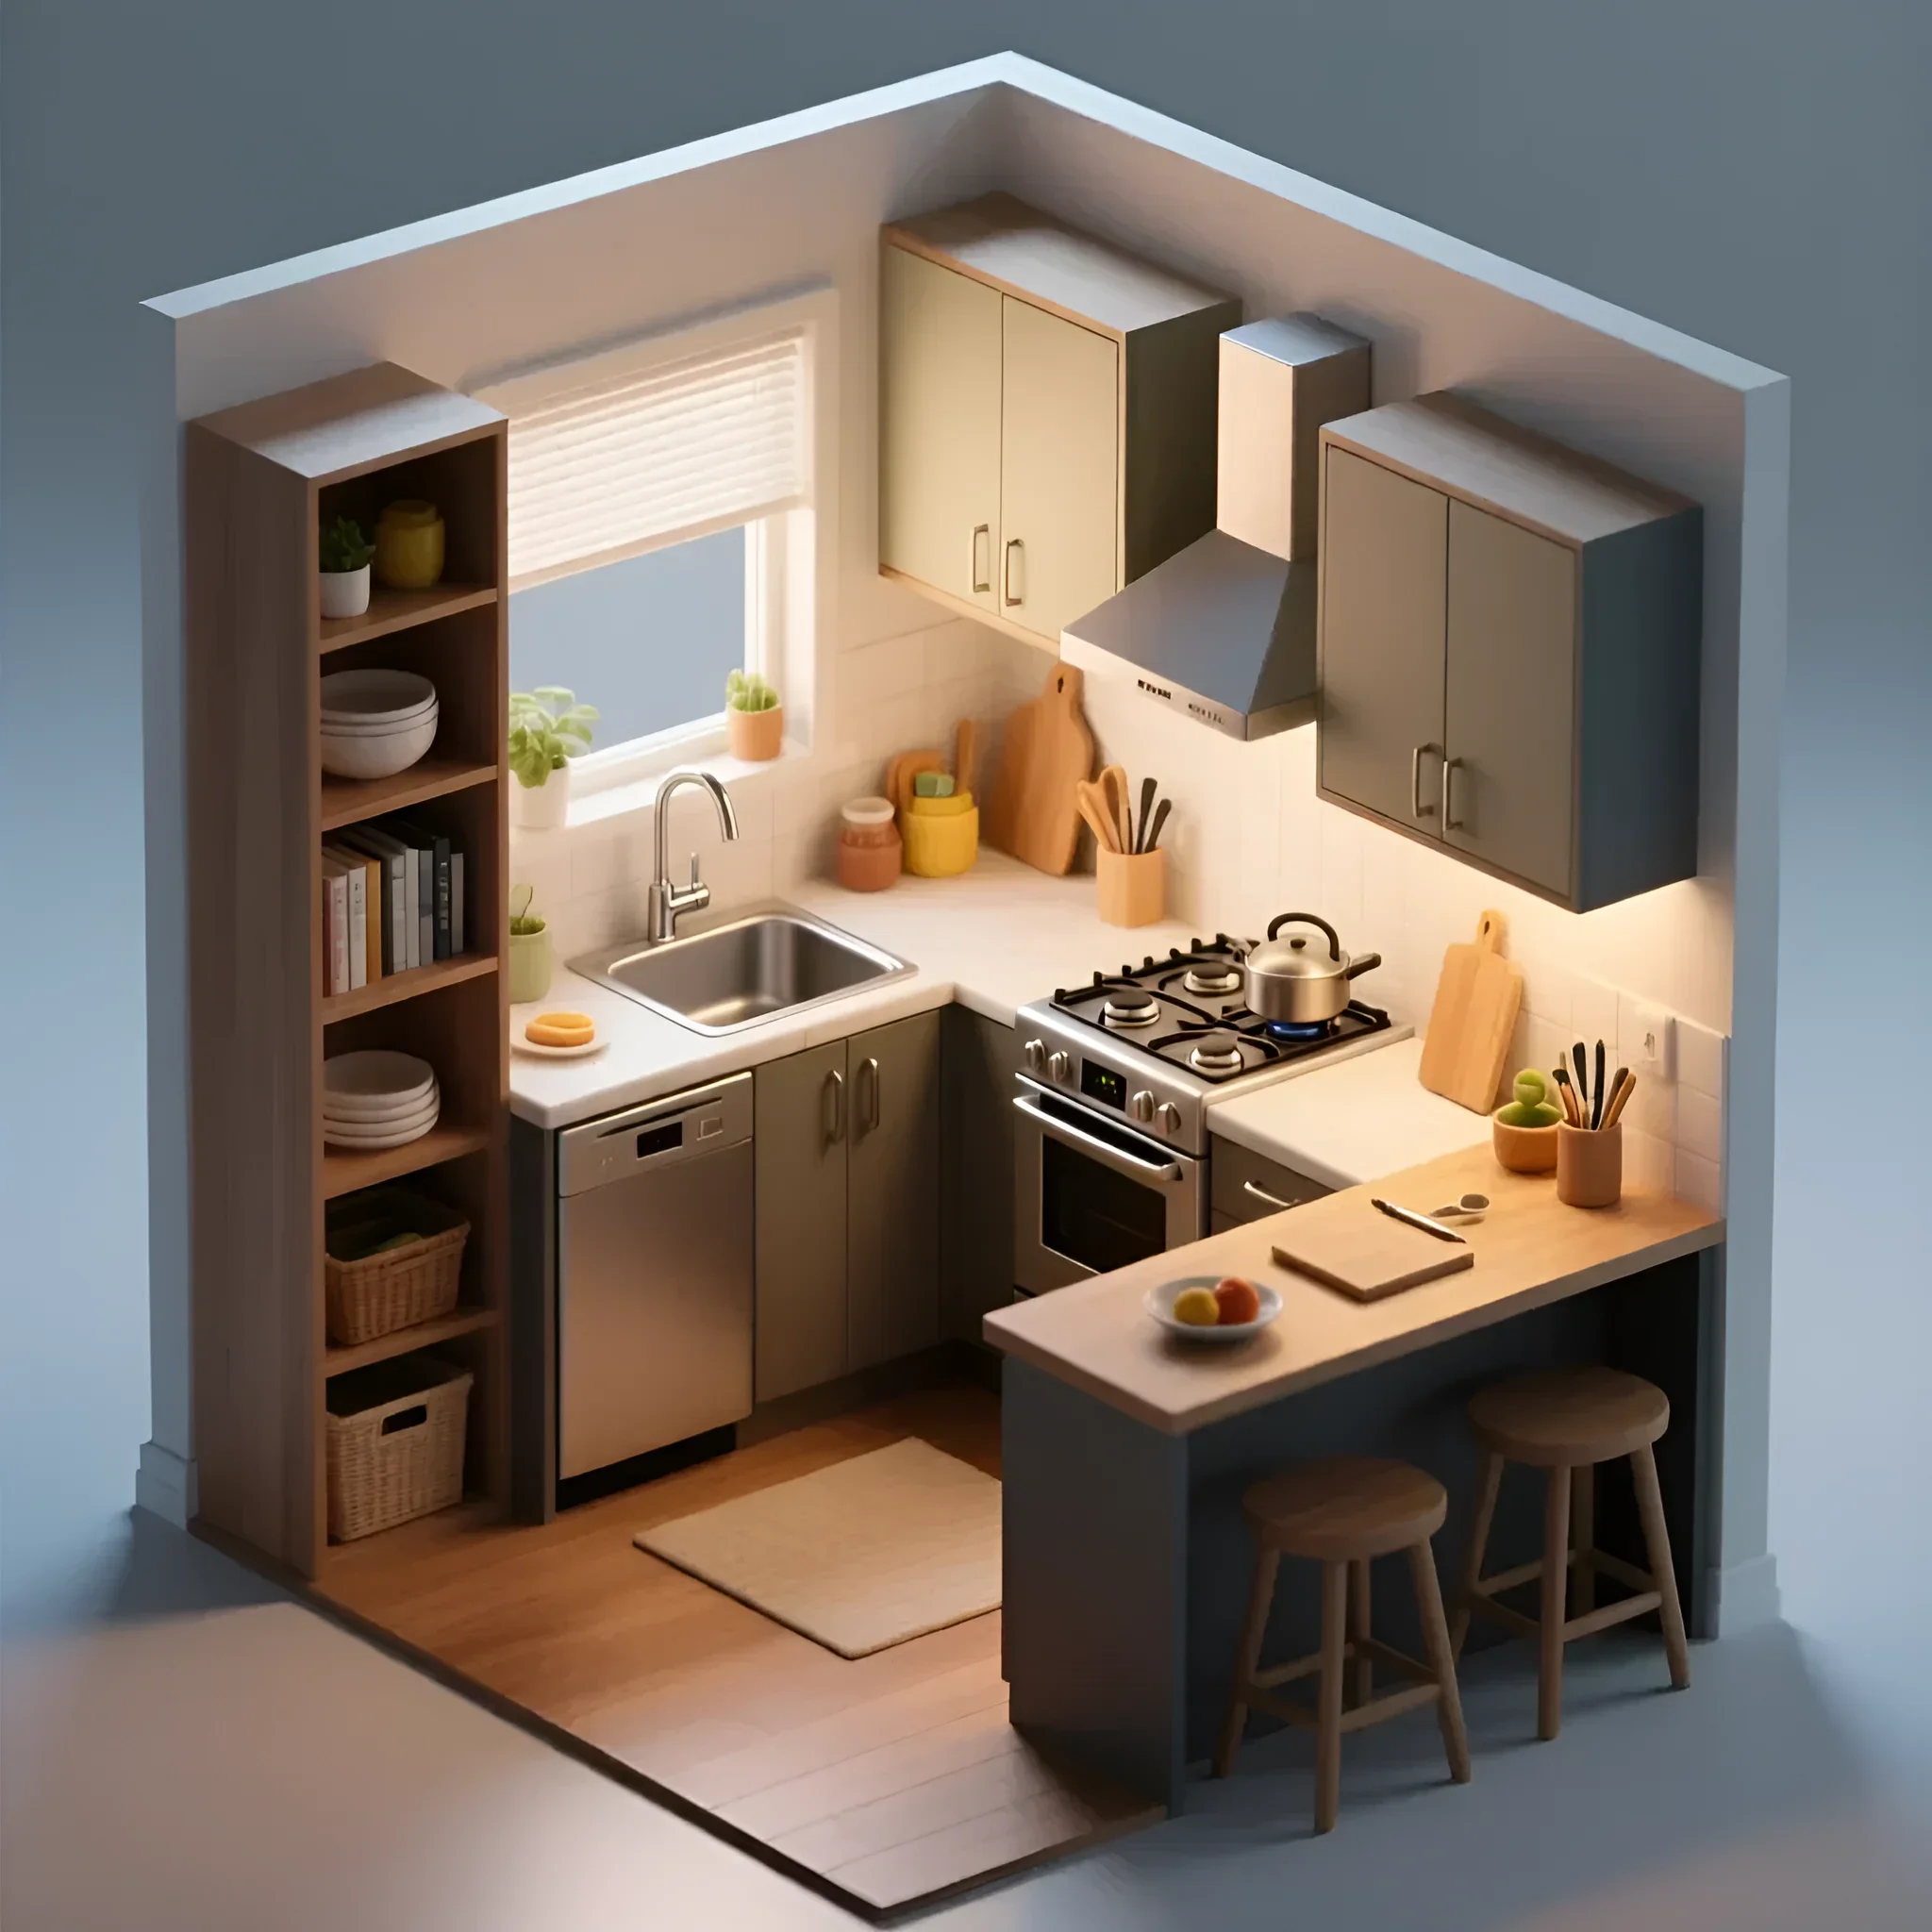
Functional Solutions and Mechanisms: Maximizing Usable Space
In a small kitchen, standard shelves are inefficient. It is necessary to use mechanisms that provide full access to the contents and utilize every cubic centimeter.
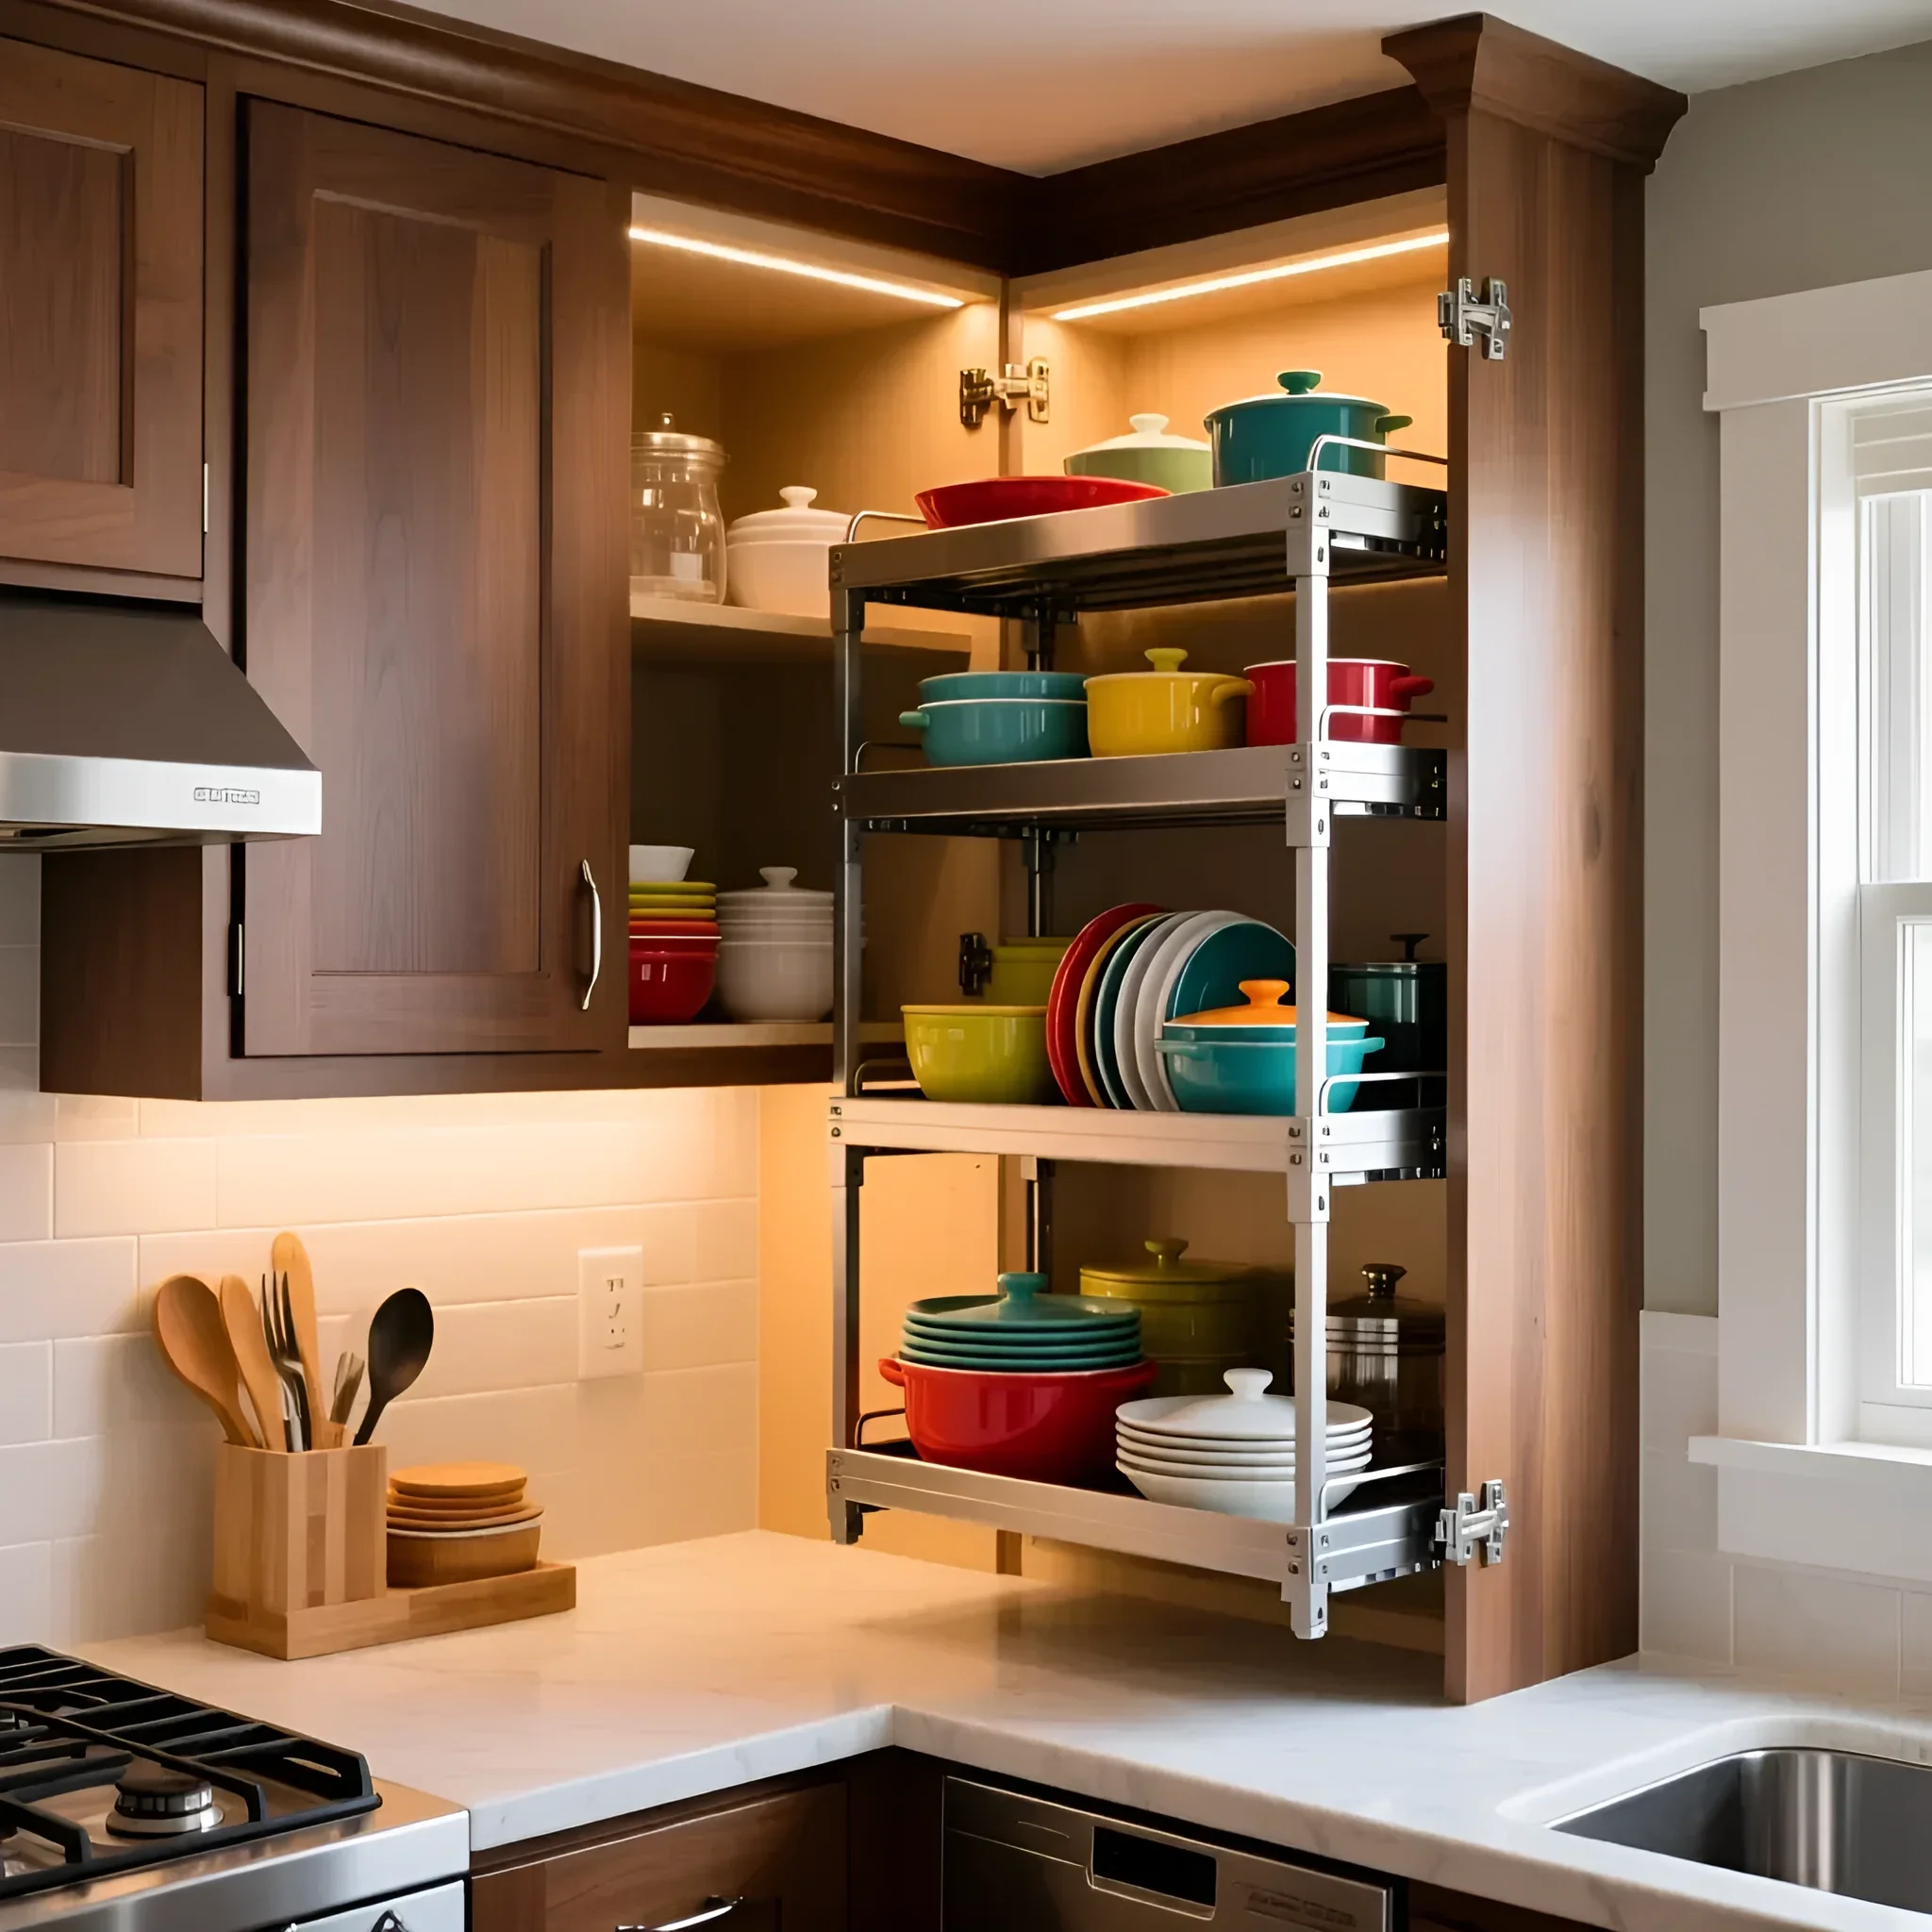
1. Corner Storage Systems
The corner is the most problematic area. To use it effectively, the following are used:
- “Magic Corner”: a pull-out system that allows you to bring out baskets hidden deep inside a corner cabinet. Requires a facade width of 45 cm or more.
- Carousels (rotating systems): shelves that rotate around a vertical axis. Ideal for storing large dishes.
2. Pull-out Systems Instead of Shelves
Lower cabinets should be equipped with full-extension pull-out drawers (metal boxes or tandem boxes). A drawer holds 30% more items than a shelf, and you can see all the contents.
- Bottle racks (Cargo): narrow pull-out baskets 15, 20, or 30 cm wide. Perfectly fill narrow gaps between appliances or walls. Used for storing bottles, spices, household chemicals.
- Internal dividers: use cutlery trays, plate organizers, and vertical dividers for lids and baking sheets.
3. Optimizing the Upper Tier
- Lift mechanisms (e.g., Blum Aventos): instead of hinged doors, use vertical lifts. They do not obstruct movement, allow the cabinet to be left open, and provide easy access to the contents.
- Dish dryer: if space is limited, consider a two-tier dryer built into the cabinet above the sink.
4. Transformable Elements
For the dining area in a very small kitchen, use:
- Pull-out or fold-down countertops: they can be hidden in a lower module or folded down from the wall/windowsill. A 60×80 cm fold-down countertop seats two people and takes up only 5–10 cm when folded.
- Bar counter: a narrow countertop (30–40 cm) attached to the wall or kitchen set. It replaces a table while taking up minimal space.
Furniture Care and Maintenance in a Small Kitchen: Preserving Newness
In a compact kitchen, furniture is subjected to more intense exposure because the work areas are located close to each other. Proper care is critical for durability.
1. Protection from Moisture and Steam
The greatest damage to furniture is caused by steam from the stove and moisture from the sink, especially if the kitchen set is made of particleboard or MDF with film.
- Joint sealing: ensure that all countertop edges, especially around the sink, are thoroughly treated with silicone sealant. This will prevent swelling of the particleboard.
- Range hood: the use of a powerful range hood (with a capacity of at least 600 m³/h for a small kitchen) is mandatory. It should operate not only during cooking but also for 10–15 minutes after it ends.
- Steam protection: if the dishwasher is located next to a wooden cabinet, use a special protective film for the countertop above the dishwasher door.
2. Care for Glossy Fronts
The gloss, which we recommended for visual expansion, requires more careful maintenance, as fingerprints and greasy splashes are noticeable on it.
- Regular wiping: use soft microfiber cloths and non-abrasive cleaning agents (without chlorine or acetone). Window cleaners are ideal.
- Grease removal: grease must be removed immediately to prevent it from hardening, especially on light-colored fronts.
3. Hardware Maintenance
The load on the hardware in a small kitchen is higher due to the frequent use of pull-out systems.
- Adjustment: once a year, check and tighten hinges and runners as needed.
- Lubrication: if full-extension mechanisms start to squeak or move jerkily, lubricate the runners with silicone spray.
Top 5 Mistakes in Arranging Furniture in a Small Kitchen and How to Avoid Them
Often, in an attempt to fit in as much as possible, owners make mistakes that make the kitchen inconvenient and even dangerous.
Mistake 1: Ignoring the “Work Triangle” Rules
Essence of the mistake: Placing the sink, stove, and refrigerator too far apart (which is rare in a small kitchen) or, conversely, too close, without enough work surface between them.
How to avoid: Ensure a minimum work surface of 40 cm between the sink and the stove. Do not place the stove directly next to the wall or the refrigerator (minimum clearance from the wall is 15 cm, from the refrigerator 20 cm).
Mistake 2: Choosing Dark and Bulky Materials
Essence of the mistake: The desire to use trendy dark fronts or large hardware, which visually reduces and weighs down the space.
How to avoid: Choose light, glossy, or semi-glossy fronts. If you really want a dark color, use it only for the lower tier, and make the upper tier light or glass.
Mistake 3: Blocking Natural Light
Essence of the mistake: Placing tall pantry cabinets or a refrigerator directly next to a window, blocking light access.
How to avoid: Tall elements (pantries, refrigerators) should always be placed in corners or at the end wall, as far as possible from the light opening. Use light, transparent curtains or blinds.
Mistake 4: Incorrect Use of Wall Cabinets
Essence of the mistake: Using a standard height of 720 mm, leaving unused space under the ceiling, or choosing cabinets of standard depth of 35 cm, which can feel oppressive.
How to avoid: Choose cabinets up to the ceiling (900–1200 mm) and reduce their depth to 30 cm. Use lift mechanisms instead of hinged doors.
Mistake 5: Overloading Open Shelves
Essence of the mistake: Attempting to replace some upper cabinets with open shelves, which quickly become cluttered and create a feeling of mess and crampedness.
How to avoid: Use open shelves only for decoration or for storing beautiful, uniform dishes. If you need a lot of storage, choose closed modules. Visual order is important in a small kitchen.
Designer Tips: Secrets of Visual Space Expansion
Visual tricks will not replace competent planning, but they can make your small kitchen much more comfortable and easier to perceive.
1. Unified Facade and Integration
The less visual noise, the more spacious the kitchen seems. Integrate all appliances (refrigerator, dishwasher) behind facades. Try to make the cabinets the same height and have minimalist handles (or none at all).
- One-line principle: if possible, make the backsplash and countertop from the same material or use very similar shades. This unifies the work area.
2. Vertical Lines and Patterns
Vertical elements draw the eye upwards, visually increasing the ceiling height.
- Backsplash: use tiles laid vertically, or wall panels with a vertical pattern. The tile size should be medium or large (e.g., 10×30 cm).
- Ceiling: it should be perfectly white and matte. Avoid multi-level structures that “eat up” height.
3. Mirrors and Reflective Surfaces
Mirrored or highly reflective surfaces double the space.
- Mirror backsplash: a very bold but effective solution. Requires frequent cleaning but provides maximum depth effect.
- Mirror inserts: use mirrors on end walls or in the dining area.
4. Proper Lighting
A small kitchen requires multi-level lighting to avoid dark corners.
- General lighting: ceiling lights or recessed spotlights, evenly distributed throughout the area.
- Task lighting: mandatory LED lighting under upper cabinets. It is not only functional but also visually separates the work area from the wall, creating a “floating” effect.
- Accent lighting: use slim pendant lights over the bar counter or dining table. The thinner and more elegant the light fixture, the better.
5. Windowsill as a Work Area
If the height allows, integrate the windowsill into the countertop. This can become an additional cooking area or dining space, which is critical for saving floor space. It is important to use moisture-resistant materials such as artificial stone or HPL plastic, and to ensure free access to the radiator (by making ventilation holes in the countertop).